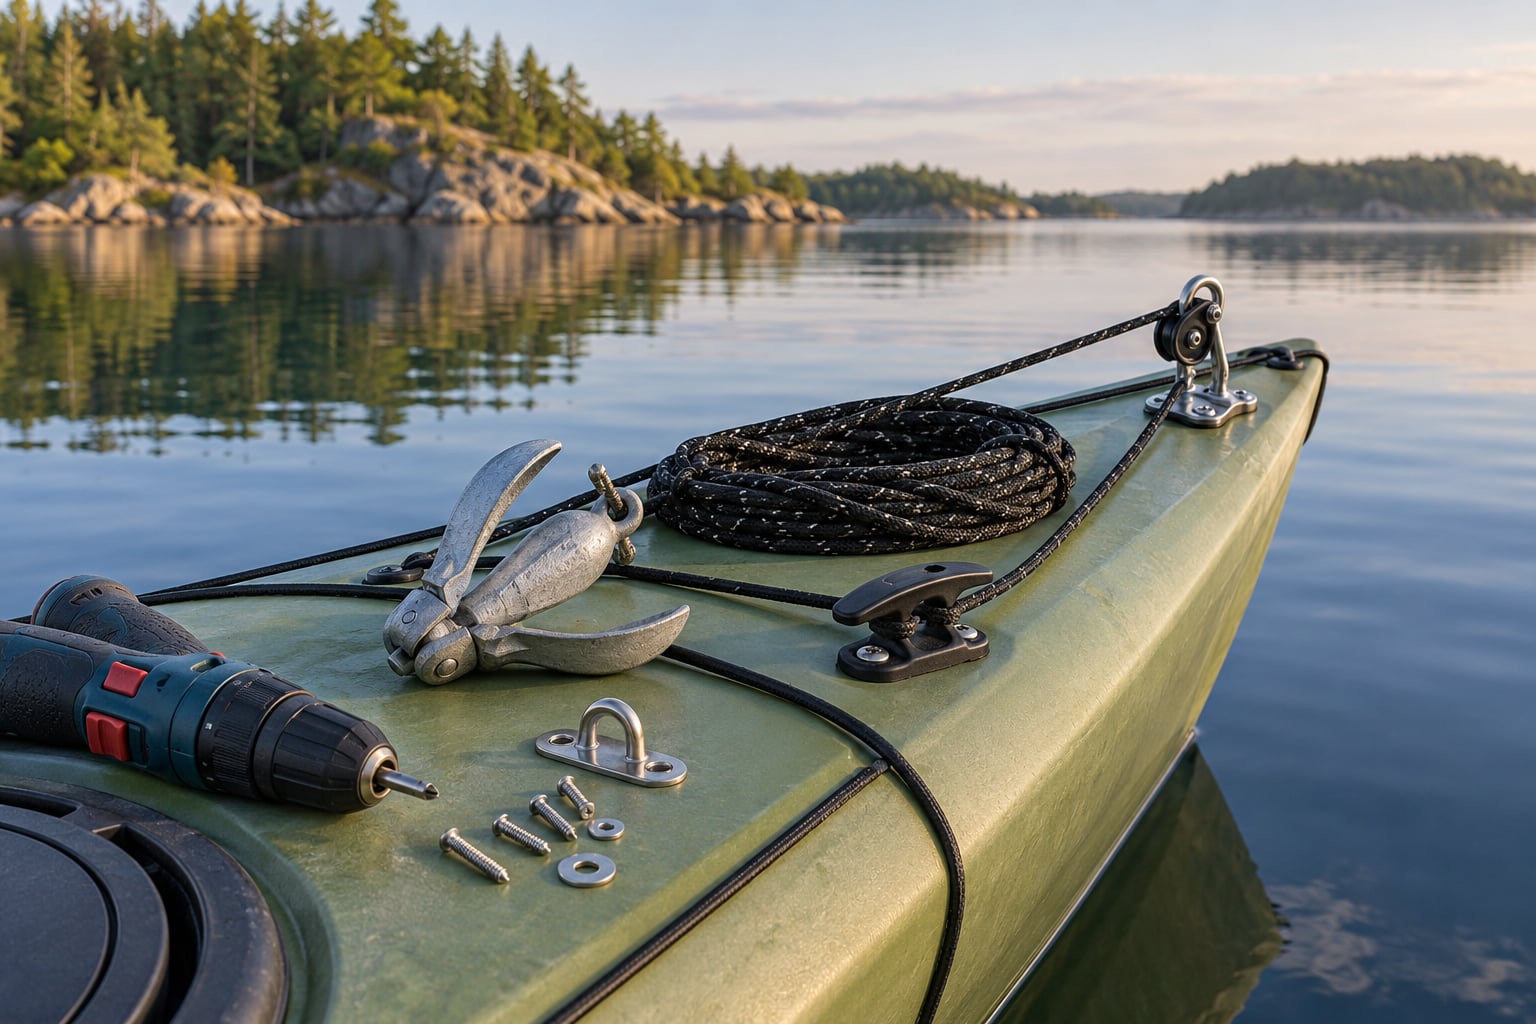
Setting up a kayak anchor trolley takes about an hour and a hand drill. You fasten a pad eye near the bow, run a closed loop of braided cord from it through the trolley hardware to a cleat by the cockpit, then clip your anchor line to the ring that slides along the loop.
The whole rig lets you move the anchor point from the cockpit to the bow without getting out, so the kayak points into wind or current rather than lying sideways and rolling. Anglers who fish one spot for an hour need it, and so does anyone anchoring in water too deep for a stakeout pole to reach.
Below is the order I use, including the mistakes that cost me a fishing trip the first time I drilled a hull.
Table of Contents
- What You Need to Set Up a Kayak Anchor Trolley
- Step-by-Step Anchor Trolley Installation
- Step 1: Choose a Mounting Location for Your Kayak Anchor Trolley
- Step 2: Mark and Prepare the Mounting Points
- Step 3: Install the Trolley Pulley
- Step 4: Thread and Secure the Anchor Line
- Step 5: Connect the Anchor
- Step 6: Test the Complete Setup
- Common Mistakes and How to Fix Them
- Frequently Asked Questions
- Where should I mount a kayak anchor trolley?
- What type of anchor works best for a kayak?
- How long should the kayak anchor line be?
- Can I use a kayak anchor trolley in wind or current?
- How do I keep the anchor line from tangling?
- Do I need to seal the mounting holes in a kayak?
- Conclusion
What You Need to Set Up a Kayak Anchor Trolley
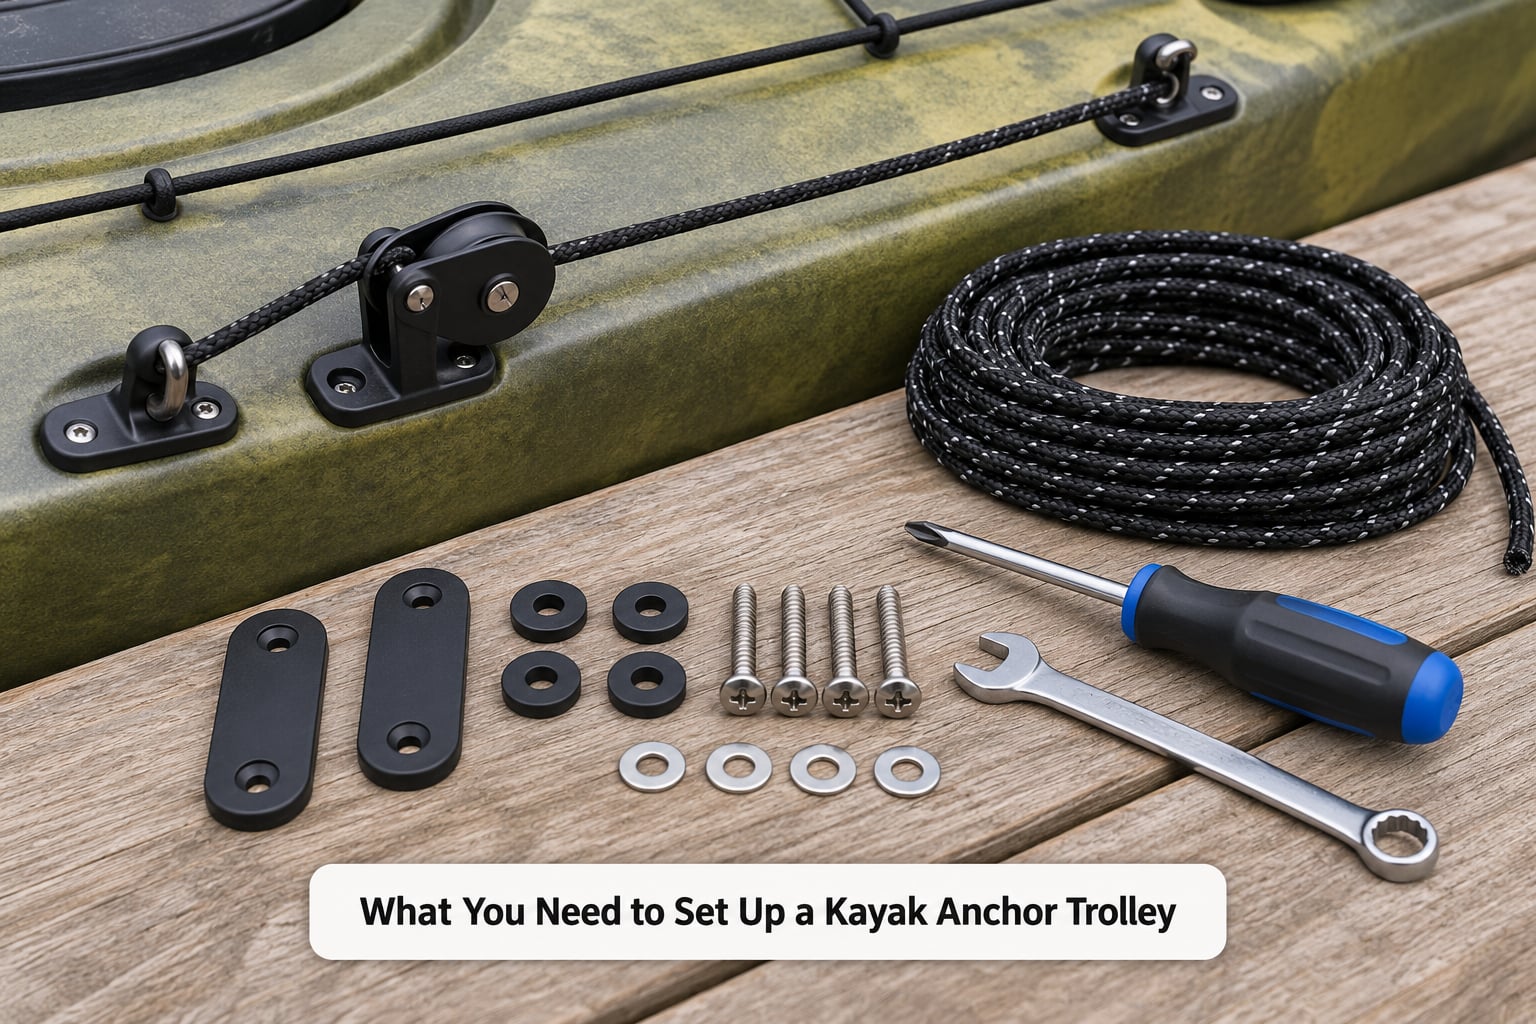
Most paddlers buy a kit rather than building one, and a kit covers everything except the anchor and the line:
- Hardware: bow pad eye or pulley, stern pad eye for a full system, sliding ring or carabiner, cleat or LeverLoc-style tensioner, backing plates, stainless bolts, nyloc nuts and washers.
- Line: 3/16 inch polyester clothesline for the anchor itself, and braid-on-braid or thin paracord for the trolley loop.
- Tools: drill with bits matched to your hull, masking tape, straightedge, centre punch, Phillips screwdriver or hex key, tape measure and a marker.
- Sealant: a marine-grade silicone or adhesive sealant rated for hulls, used under every bolt head and over the finished fastener.
On the anchor side, a small grapnel covers most fishing water: about 3 pounds for a light kayak on calm lakes, 5 to 7 pounds for a larger boat or open water. In a river, most paddlers switch to a heavier fluke or a drag chain rather than a trolley alone.
Two things to check before the drill comes out. Your kayak maker may have opinions about drilling, especially on balsa or foam core hulls. And if you plan to anchor over private water, know the rules for the spot before you drop a hook in it.
Step-by-Step Anchor Trolley Installation
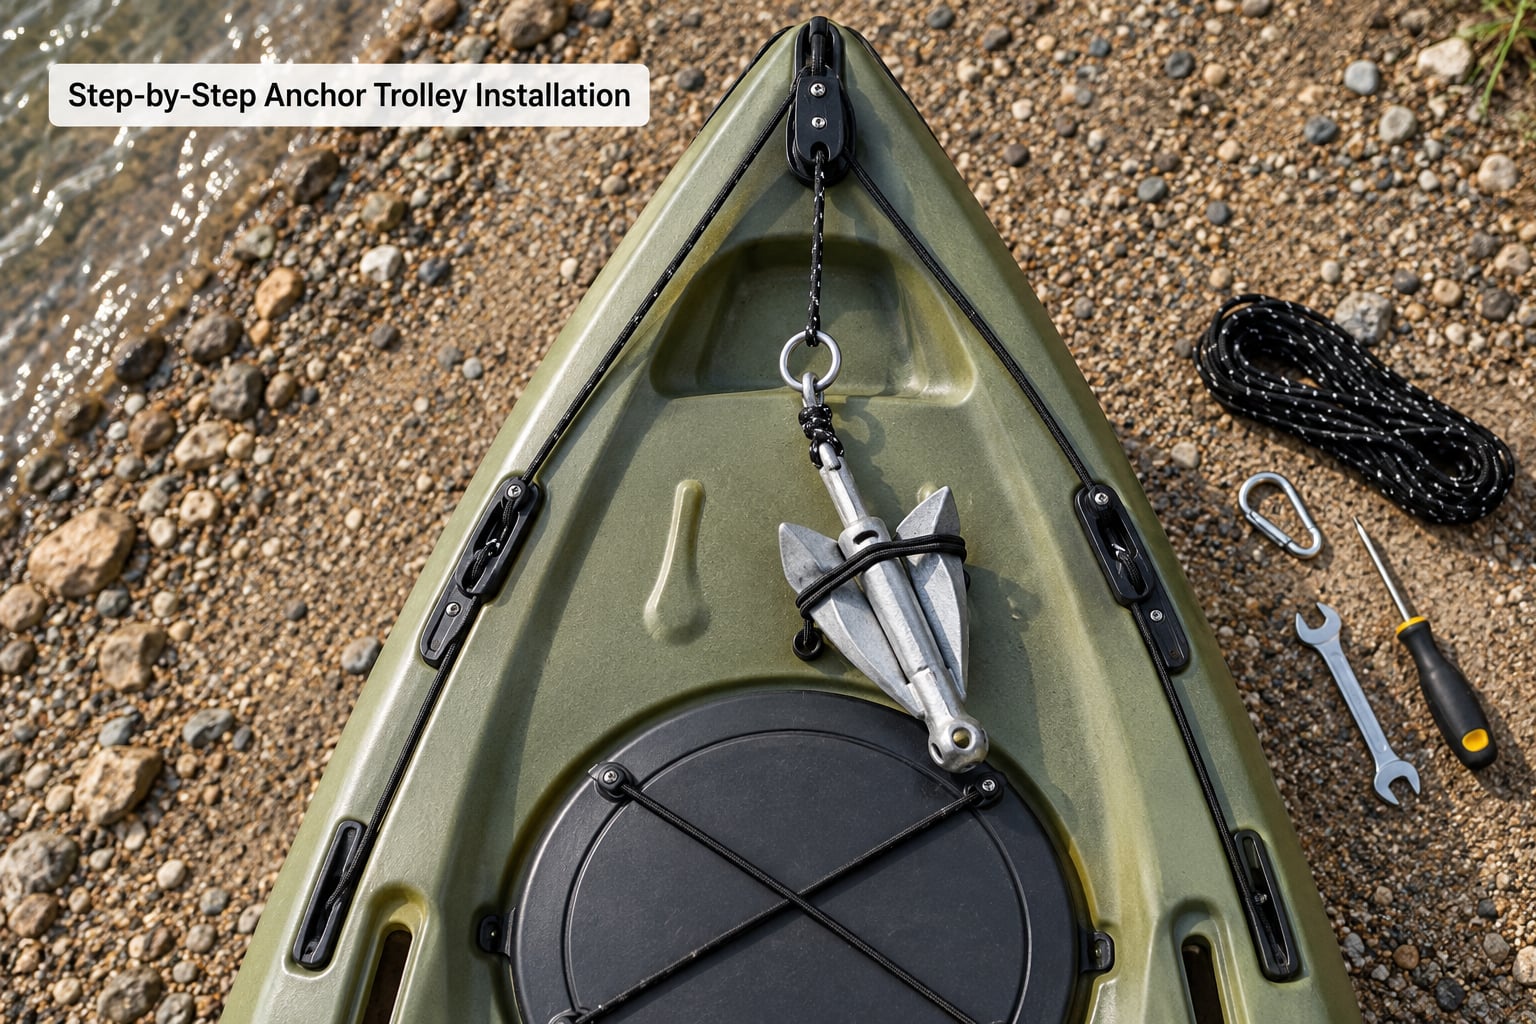
Step 1: Choose a Mounting Location for Your Kayak Anchor Trolley
Put the bow pad eye about 20 to 24 inches back from the tip, on the side away from your paddle hand so the shaft and blades stay clear of the hardware.
Then work around the deck. A pulley sitting over a hatch makes that hatch unusable, a backing plate pressed into a foot brace gets in the way of your knees, and a cleat near the seat is a knuckle hazard every time you paddle. On rudder-equipped boats, check that the stern line does not foul the rudder cable, and if you want a full trolley rather than a bow-only one, repeat the placement at the stern.
Masking tape marks the spot so you can move it a few inches without leaving a trail of pencil.
Step 2: Mark and Prepare the Mounting Points
Stick a square of tape over the mark, trace the pad eye or backing plate outline on it, and mark the centre of the hole. Centre punch it so the drill bit starts where you want it.
Drill a pilot hole a size or two under the bolt shank first, then open it to full size while the tape still catches the plastic shavings. That two-stage step is what keeps the bit from grabbing the deck and leaving a brown ring around the hole. Deburr both faces, wipe the dust off, and check inside the hull that you have not drilled into foam or balsa.
Step 3: Install the Trolley Pulley
Push a backing plate inside the hull, run the bolt through the pad eye, washers and plate, and tighten the nyloc nut from the cabin side. Put a bead of sealant under the bolt head before it goes in and a second bead over the finished head.
Tighten until the pad eye sits flat, then stop. Hull skin is thin, and a bolt cranked down hard will crush the gelcoat or dimple the deck. Repeat at the stern for a full system, keeping the two pad eyes on the same side and the same fore-and-aft line so the ring tracks straight.
Step 4: Thread and Secure the Anchor Line
Measure the loop first. It needs to run from the bow pad eye down the deck to the cleat at the cockpit, plus enough spare to pull the ring back aft when you want to anchor from the stern.
Run the line through the pad eye, through the sliding ring, and back again until the two legs overlap, then tie the ends together with a blood knot or a doubled overhand. Leave a short tail, trim it close, and add a dab of sealant or heat-shrink to the knot so it cannot work loose in the water. Test that the ring slides the whole length with a firm pull before you go any further.
Step 5: Connect the Anchor
Clip the anchor line to the ring with a screw-gate carabiner, or use a quick-release shackle if you want one-handed release in current. A carabiner is faster; a shackle is easier to free with cold hands.
Anglers who fish rocky structure often add a sacrificial link, a short piece of thinner braided cord spliced into the anchor line, so a snag shears the weak point instead of dragging your hardware along. Whatever connector you use, keep it above the waterline when you are not anchoring so a wave does not snatch it out of your hand.
Step 6: Test the Complete Setup
Do this in shallow, calm water on a day with no deadline. It takes ten minutes and it is the step most people skip.
- Deploy the anchor in 2 feet of water and confirm the ring stops where you set the cleat.
- Pull hard on the anchor line and check the pad eye and backing plate do not rotate or creep.
- Sit in the cockpit, paddle a little, and confirm nothing hits your knees, shins or hands.
- Push off, run forward a few boat lengths, and watch whether the kayak yaws or pulls tight on one side.
- Walk the anchor line along the hull to be sure it does not rub the finish.
If the ring stalls halfway, something is binding in the pad eye. If the kayak swings, you have the ring too close to the cockpit for the wind you are anchoring in.
Common Mistakes and How to Fix Them
Putting the bow pad eye too far aft. The classic complaint from first-time installers is that the ring stops short of the bow, so the kayak still hangs off to one side. Move the pad eye forward until the ring can reach the stem with the line under tension.
Skipping the backing plates. Several paddlers on the kayak fishing forums report that self-tapping screws with sealant alone hold fine on hulls under 12 feet. Backing plates still cost almost nothing, protect the deck from the bolt ends, and spread the load on a soft or composite hull.
Overtightening the bolts. The hull only needs the fastener snug. Over-tightening crushes the laminate and gives you a dent that never quite goes away.
Mounting on the paddle side. If a paddle holder or spray skirt sits on your chosen side, the trolley fights your paddle stroke every time. Choose the other side before you drill, not after.
Leaving a long tail of line. A 2 inch tail on the trolley loop works its way into the sheave and jams the whole system. Trim close and tape or seal the knot.
Winding the anchor line across the deck. Feed the anchor out in the direction you are drifting. Dropping it the other way wraps the anchor line around the trolley cord, which is how a good anchor ends up lost over the side.
Ignoring corrosion. Cheap plated hardware pits in salt water within a season and a pitted pulley binds under load. If you fish salt water, go with A4 or 316 stainless hardware and rinse the trolley with fresh water afterwards.
Storing the anchor badly. Weight sitting loose in the hull changes how the boat handles. Keep the anchor forward of the seat in a deck pocket or strapped along the rail so the centre of gravity stays where it was designed.
Not ready to drill? Adhesive-mounted pad eyes and deck-track fittings hold a light-duty trolley on many hulls, and inflatable kayaks use suction cups or a bow tether system entirely. Neither is a substitute for a properly sealed through-bolt on a hard-shell boat in current, so treat them as a light-wind option.
Frequently Asked Questions
Where should I mount a kayak anchor trolley?
Mount the bow pad eye about 20 to 24 inches back from the tip, on the side away from your paddle hand and clear of hatches, rod holders and foot braces. A full system adds a matching pulley or pad eye at the stern so the ring can travel the length of the deck.
What type of anchor works best for a kayak?
In shallow mud, a stakeout pole is all you need. On rock, weed or shell bottom, a small grapnel works well: around 3 pounds for a light kayak in calm water and 5 to 7 pounds for a larger boat or exposed water. Moving water usually calls for a heavier fluke or a drag chain.
How long should the kayak anchor line be?
Most paddlers run a line about twice the water depth, plus extra to reach from the cleat to the anchor without piling slack on the deck. A useful working range is 15 to 25 feet of 3/16 inch polyester line. More scope is safer than less once current picks up.
Can I use a kayak anchor trolley in wind or current?
Yes, and that is what the trolley is for. Running the ring toward the bow lets the kayak point into wind and current instead of lying sideways, which is far more stable. Ease off the tension in gusts so the hull is not pinned flat, and pull toward the stern when the current is strong.
How do I keep the anchor line from tangling?
Feed the trolley line out in the same direction the kayak is drifting, never across the deck, and keep the anchor line clear of the trolley cord until it reaches the ring. On early trips, wrap the anchor line around the ring a couple of turns before clipping in, and straighten any twist at the cleat.
Do I need to seal the mounting holes in a kayak?
Yes. Put sealant under every bolt head and over the finished fastener, and seal the inside face too. Balsa-core and foam-core hulls soak up water fastest, so check what the boat maker recommends before drilling and keep a tether-based system in mind for inflatables.
Conclusion
To set up a kayak anchor trolley, pick a clear spot forward of the cockpit on the side away from your paddle, drill and seal it properly, fit the bow pad eye with a backing plate, run a sized loop of cord to the cleat, and confirm the ring slides the full length. Then test the whole rig in shallow calm water before you rely on it.
Do that test on a calm afternoon with no fish biting, and the first real anchoring trip will feel ordinary instead of nervous.