Learning how to read sonar for structure and bait comes down to three things: knowing where the bottom is, telling hard cover from soft cover, and separating real fish marks from debris. A fish finder does not photograph the water. It sends a sound pulse down in a cone and draws echoes back, so every mark on that screen is an interpretation, not a picture.
That distinction matters more than most beginners expect. The unit gives you return strength as color and brightness, depth from timing, and shape from the sweep of the cone. What you do with those three inputs is the whole skill.
The good news is that the method is repeatable. Work through the steps below in order and the screen stops being a wall of noise.
Table of Contents
- What You Need
- How to Read Sonar for Structure and Bait Step by Step
- 1. Set the Sonar for Clearer Readings
- 2. Identify the Bottom and Its Shape
- 3. Tell Hard Structure From Soft Cover
- 4. Recognize Bait and Fish-Holding Marks
- 5. Use Arches, Shadows, and Secondary Returns
- 6. Mark Targets and Turn Sonar Into a Fishing Plan
- Common Mistakes
- Frequently Asked Questions
- Do brighter sonar returns always mean bigger fish?
- How should I set sonar sensitivity for fishing?
- What does a dark shadow behind a sonar target mean?
- Can sonar show bait as well as fish?
- Conclusion
What You Need
You need very little beyond a working unit and a habit of watching it deliberately. Most confusion on the water comes from setting expectations before understanding what the display can and cannot tell you.
Start with a functioning fish finder and a correctly mounted transducer. A transducer mounted askew, or one with air bubbles streaming past it, will bend the bottom line on your screen and send you chasing a drop-off that is not there. If the bottom shape looks like a long smooth slope on one side that suddenly falls away, suspect the mount before you trust the structure.
Have the manual for your unit nearby. Terminology, menus and display behavior differ between manufacturers, and the control that sets sensitivity on one screen is called gain on another. You are looking for four things: how to adjust sensitivity, how to set and lock range, how to change zoom or a zoom window, and how to control scroll speed.
Bring a chart or mapping view of the water when one is available. Depth contours let you check whether the drop-off you just crossed lines up with a known channel edge. Without that cross-check, every line on the screen carries the same weight, and that is where beginners go wrong most often.
Decide how you will mark targets before you need to. A waypoint button on the unit, a phone GPS app, or even a marker buoy for a spot you plan to fish again all work. Waypoints are what turn a lucky catch into a repeatable location.
Finally, know what you are hunting. Sonar returns do not carry species names. A veteran forum hand put it plainly: it is really hard to identify species based solely on an echo return, but you can infer quite a bit from known fish behavior, position in the water column, time of year, structure and water temperature.
Note that range, frequency options, color palettes and cone angles vary by unit. Read your own manual for the numbers, then use this guide as the interpretation framework.
How to Read Sonar for Structure and Bait Step by Step
Here is the repeatable process. Six steps, always in this order: set the display, read the bottom, judge the cover, find the bait, interpret shape and shadow, then turn it into a plan.
1. Set the Sonar for Clearer Readings
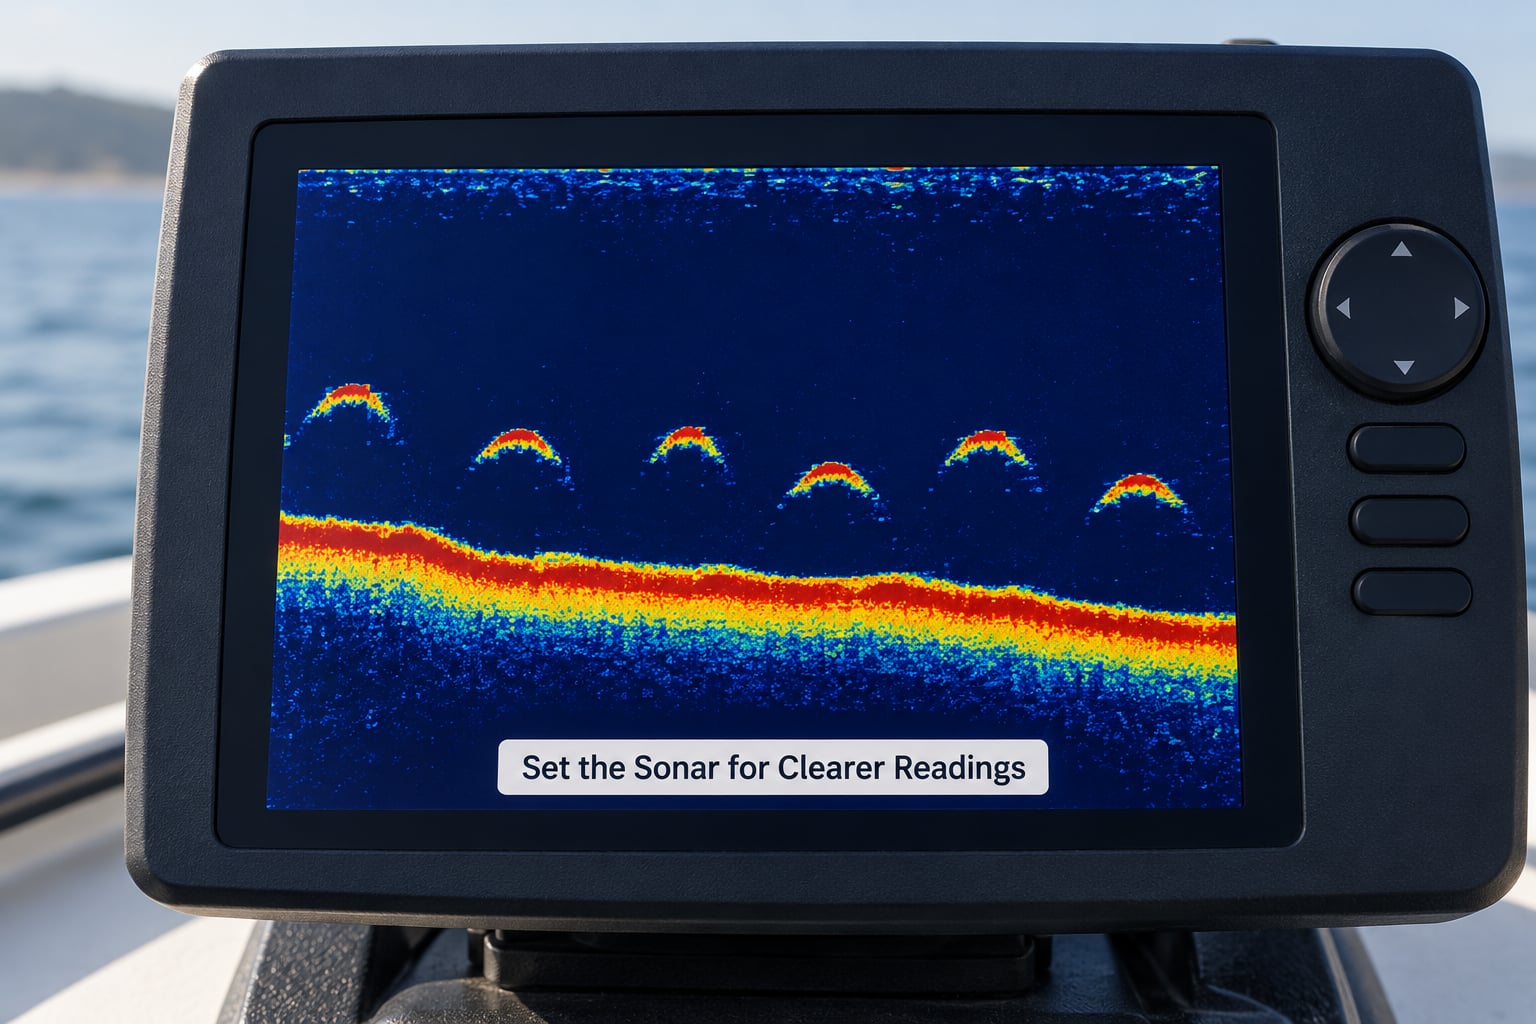
Set sensitivity so the bottom line is solid and clear, then stop. That is the correct starting point, and most beginners immediately make it worse by cranking sensitivity up to hunt for small marks.
Higher sensitivity does reveal fainter targets, including bait and fish holding well off the bottom. It also fills the water column with noise, bubbles, suspended debris and false arches, and once noise fills the screen, real targets stop standing out.
The better reference point is the noise floor. Raise sensitivity until faint background speckle just begins to appear, then back off a little. That setting shows weak targets while keeping the screen readable, and on many units it also reveals a thermocline as a faint horizontal line, which is a useful reference for the rest of the trip.
Then set range to just deeper than your actual bottom, and lock it. Auto range that keeps changing while you fish makes the screen jump and erases your sense of scale. Use zoom or a zoom window to inspect a specific depth band once the picture is otherwise clean.
Match scroll speed to boat speed so the picture scrolls at a rate your eyes can follow. Scroll it too fast and everything smears into unreadable bands. Finally, consider turning automatic fish ID icons off while you learn. Anglers on the major fishing forums are near-universal on this: the icons are inaccurate and will only confuse you. You want raw returns.
2. Identify the Bottom and Its Shape
The bottom is the one continuous line that never breaks. Everything above it is water column, and everything below it is noise and signal loss. Once you can find that line instantly without hunting for it, half of reading sonar is behind you.
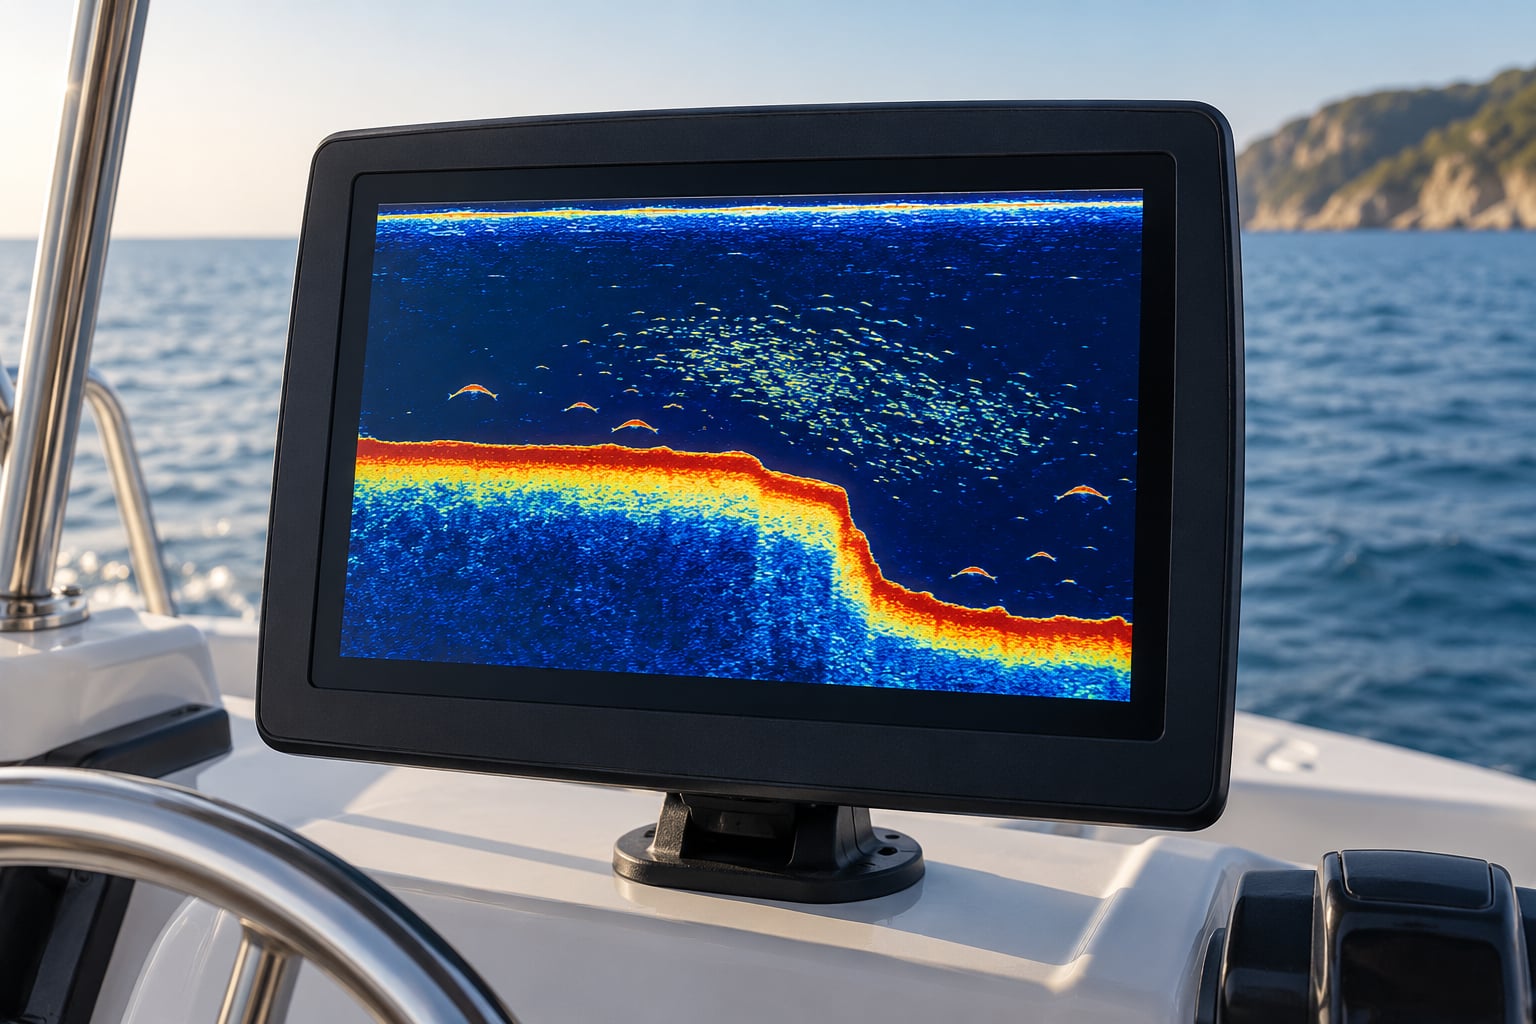
Its depth and the way it changes across the screen give you the shape of the bottom. A gentle rise is a shoal or point. A sudden vertical break is a drop-off or ledge. A series of rising humps often marks a channel or a series of humps and depressions. In clear water with a hard bottom you may also see a fainter second line below the first, which is the echo bouncing off the hull bottom before reaching the lake or riverbed.
Remember that the cone has width. A mark that looks like it sits under the boat may be several yards off to one side. This is why an abrupt bottom change can appear a beat before you actually reach the edge, and why wide-beam units can miss fish sitting exactly on the lip of a drop-off. Narrow beam for that lip, wide beam for coverage.
The order matters. Read the bottom contour before you look for fish. Anglers who start hunting arches end up chasing marks with no idea what kind of cover produced them, and most marks have no cover worth chasing.
3. Tell Hard Structure From Soft Cover
Return strength is your hardness clue. Rock, gravel, concrete, ledges and dense timber return a strong, sharp, bright signal. Soft mud, silt and heavy vegetation return weaker, softer, more smeared signals, and a thick weed bed can almost disappear into the noise at moderate sensitivity.
Color helps on units with a color scale, where brighter colors usually mean stronger returns. A thick, bright, sharply defined bottom line tells you the bottom is hard, which matters for anchoring and for predicting which species will hold there. A thin, dim, wavering line tells you the opposite.
Return strength alone never identifies a target. The same rock that reads hard in shallow water may read soft in deep water, because the signal weakens with distance and the water absorbs high frequencies faster. Surrounding depth and shape give you the context: a small hard return hanging a foot above a bottom line at the edge of a steep drop is something quite different from a hard return buried in the bottom line out in the middle of a flat.
Brush piles, stump fields, rock piles and submerged timber all read as discrete hard marks just above or attached to the bottom. The shadow behind them, when your unit shows one, tells you how tall they are.
4. Recognize Bait and Fish-Holding Marks
Bait looks like many small returns packed close together, usually in a loose cloud or a denser stacked mass, and it hangs in the water column above structure rather than sitting on the bottom. A single gamefish tends to show as one thicker mark or an arc. A bait ball shows as a blob of overlapping returns that grows, shrinks and moves as a unit.
That is the core contrast: one thick mark is likely a fish, many small marks together are likely bait, and the gamefish you want are usually hanging at the edge of that bait or under it.
Position matters as much as shape. Marks tight to the bottom suggest fish holding on structure. Marks suspended well above it suggest fish patrolling open water or a bait column. Fish feeding on a bait ball often stack below it rather than beside it, so if you see the cloud, look immediately underneath before you move.
Conditions change the picture. Wind and current flatten a bait ball into a thin smear and scatter individual fish into a loose trail that looks like clutter. Bait that has been pushed deep by light tends to hug the bottom, and bait held shallow by a thermocline or cold layer can stay pinned near the surface. A false bottom, caused by a thermocline or a density layer reflecting the surface return, can look like a solid bottom with fish stacked on it when the real bottom is much deeper.
So a mark above the bottom line is not automatically a fish. Consider wind, current, temperature layers and boat speed before you commit to a read.
When you do find bait, do not run over it at speed. Slow down, work the area from a different angle, check a different depth, and watch how the cloud responds. The quickest way to find fish is to find the bait, then let the screen tell you where the fish are in relation to it.
5. Use Arches, Shadows, and Secondary Returns
A fish moving through the cone draws an arch because the cone sweeps past it, hitting the front of the fish first and the back last. The arch’s thickness relates to the size of the target. Its length relates to how deep the fish sat inside the cone and how long it stayed there, not to how big the fish is. Beginners routinely get that second point backwards and end up measuring fish that are not there.
A half arch or a hook shape means the fish only entered the edge of the cone. A stationary fish shows a flat dash or blob rather than an arch, which is a useful check: if you see a long stack of identical arches while moving slowly over one spot, you are probably re-displaying the same fish several times, not counting a school. That duplicate-display effect is one of the most common beginner confusions on the water.
On side and down imaging, shadows matter as much as the bright return. A raised object blocks the sonar beam behind it, so a dark shadow directly behind a bright return confirms a target standing above the bottom. Longer shadows mean taller targets. On 2D units a faint shadow behind a strong mark serves the same purpose.
Overlapping marks and bright bands along the bottom usually mean dense structure rather than fish. Multiple faint bottom returns, sometimes called second and third returns, show the signal bouncing off the hull before reaching the bottom, and their weakness tells you how much signal you have left at that depth.
6. Mark Targets and Turn Sonar Into a Fishing Plan
This is the step that turns reading sonar into catching fish. Log four things for every spot worth remembering: the depth of the structure, the depth of the bait or fish marks, the bottom type, and the waypoint.
For example: 28 feet, ledge on the north side of the channel, hard bottom, bait at 22 feet, fish arches just under the bait. That note is worth more than a month of aimless trolling, because next trip you can drive straight there and know exactly where to look.
Prioritize marks by what you know about the species. If you are after fish that relate to structure, marks hanging over a break beat suspended marks over flat bottom. If you are after a species that chases bait in open water, work the bait ball and its edges rather than the rock it happens to be near.
Position yourself relative to the target rather than driving over it. For a ledge, work along it with the structure on your sonar’s side so you can hold a consistent line. For a channel edge, sit in the channel and cast or troll toward the drop. Then verify the read visually when it is safe to do so, or confirm it with the chart, since a visual confirmation of one landmark beats any number of screen readings.
Watch your scroll speed as you reposition, because a screen that scrolls at a different rate from the boat shows you a distorted picture of where the structure sits relative to the hull.
Common Mistakes
Nearly every misread on sonar traces back to one of a handful of habits. Here they are with the correction that fixes each.
Running sensitivity too high. You spot one more faint return, gain more, and the screen fills with noise. Turn it back down until the bottom is clean and the background is just slightly speckled.
Confusing the bottom line, thermocline or false bottom with fish. A thermocline can draw a horizontal line across the screen, and a density layer can fake a bottom. Check whether the mark moves with the boat’s depth or holds at a fixed depth, and whether it lines up with a chart reading.
Treating every arc as a fish. Bubbles from wake and prop wash, suspended debris and fish that hover at the cone edge all produce arcs. Ask whether the mark holds position relative to structure, and whether it repeats in the same spot each pass.
Ignoring shadows. A bright return with a dark shadow behind it is a raised object, and the shadow’s length gives you height. Without it, you may dismiss a brush pile as a fish.
Reading steep edges that are mount artifacts. A sudden bend in the bottom line that appears only in one direction of travel usually means the transducer is mounted off-angle. Check the mount before you fish the drop-off.
Relying on a single screen setting. Deep water needs different range and often a lower frequency than shallow water. A screen tuned for 20 feet will disappoint you at 80. Reset when you change depth or species.
Reading marks without context. No species name appears on the screen. Combine what you see with season, temperature, structure and known fish behavior before you decide what you are looking at.
A few habits that help more than any single setting. Slow the boat down until the picture is readable, because there is no prize for covering ground at unreadable detail. Take screenshots of anything interesting; comparing a stored image with a later pass teaches you faster than any guide. And when a screen leaves you unsure, the second-opinion trick helps: compare high and low frequency views side by side, since hard structure stays strong on both while soft targets tend to drop out on the higher frequency.
Frequently Asked Questions
Do brighter sonar returns always mean bigger fish?
No. Brightness usually reflects the strength of the echo, not the size of the target. Return strength depends on species, the angle of the fish to the cone, depth, bottom composition and your sensitivity setting. Judge a return by its shape and position in the water column, and use arch thickness, not color, as your rough size clue.
How should I set sonar sensitivity for fishing?
Start at a moderate setting that shows a solid bottom line with clear separation between it and the water column. Raise sensitivity slightly if bait or small fish are hard to see, and lower it if the screen becomes crowded with noise. A useful target is the noise floor: the point where faint background speckle just begins to appear.
What does a dark shadow behind a sonar target mean?
A dark or weak area behind a strong return usually represents a shadow cast by an object standing above the bottom, such as a fish, stump, rock or brush pile. On side imaging, a longer shadow means a taller object. Shadows are useful confirmation that a mark is raised rather than part of the bottom, but they are not foolproof in aerated or moving water.
Can sonar show bait as well as fish?
Yes, though it takes practice. Bait usually appears as many small returns packed close together in a loose cloud or dense stacked mass above structure, while a gamefish shows as one thicker mark or an arc. Finding bait first is often the fastest route to fish, because gamefish stack at the edges of a bait ball or just beneath it.
Conclusion
Start with one habit: get the display clean enough that the bottom line is unmistakable, then learn the shape of the bottom before you look for a single fish. Once that line is familiar, everything above it gets easier to place.
From there, work through the same order every trip. Read the contour, judge the hardness of the cover, look for bait as a cluster of small marks, use arches and shadows to confirm targets, and write down the depth and waypoint of anything that looks promising.
Sonar is a decision aid, not a substitute for observation, judgment and safe boating. It narrows the water down for you. Where you go from there is still on you.