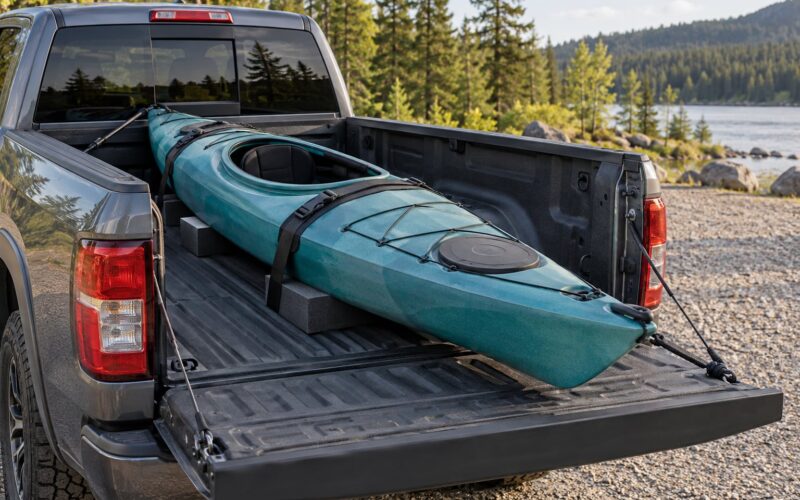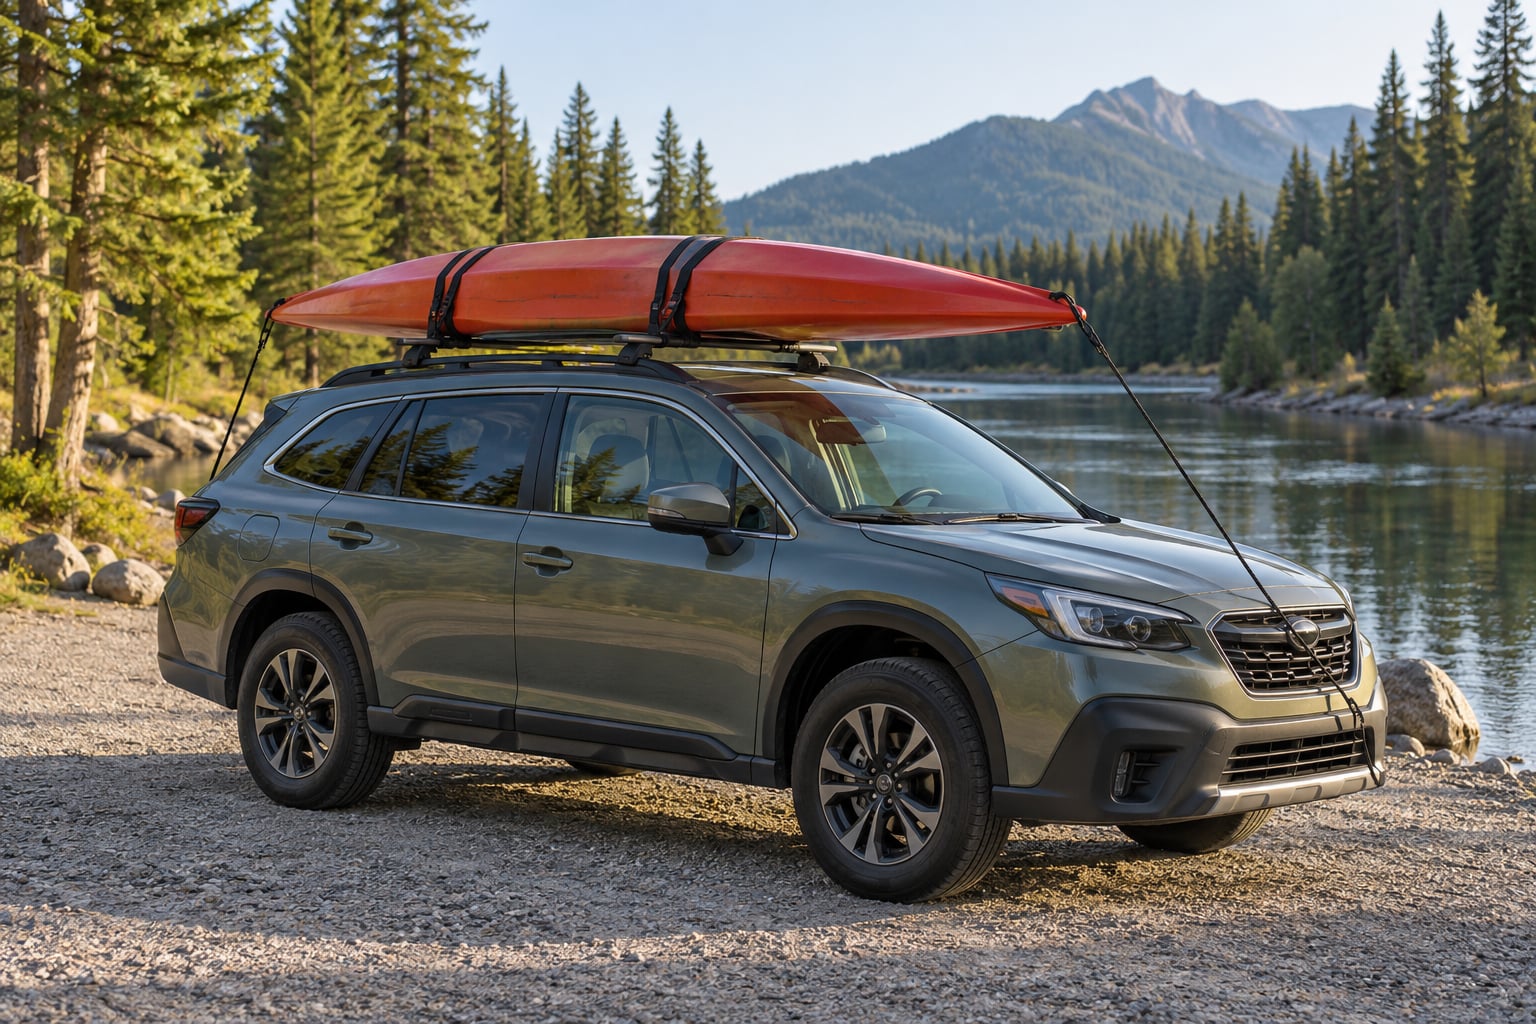
To tie down a kayak on a car roof, you do three things: sit the hull side down and centred over your crossbars, lock two cam straps over the deck, then run bow and stern lines from the grab handles to anchor points at each end of the car. Skip any one of those and the boat shifts, hums, or comes off at speed.
Most of the trouble I see comes down to two habits. People reach for ratchet straps because they feel stronger, and they crank everything down until the plastic hull dimples. Cam straps hold a kayak fine, and they let go before the boat breaks.
If you follow the steps below, a full setup takes about fifteen minutes the first time and five minutes once your hands know the routine. Crossbar hardware keeps improving, so check whether your car now offers a factory-rated anchor point before improvising one.
Table of Contents
- What You Need
- Step-by-Step: How to Tie Down a Kayak on a Car Roof
- 1. Check Your Vehicle and Kayak
- 2. Position the Kayak
- 3. Attach the Main Tie-Down Straps
- 4. Secure the Bow and Stern
- 5. Tighten, Test, and Recheck
- Common Mistakes and Fixes
- Frequently Asked Questions
- Can you use ratchet straps to tie down a kayak?
- Are bow and stern lines really necessary for a kayak?
- How tight should kayak straps be before I crush the hull?
- How far can a kayak overhang the roof, and do I need a flag?
- How do I transport a kayak without a roof rack?
- Do I need to recheck the straps while driving?
What You Need
Learning how to tie down a kayak on a car roof starts with the hardware. If you are missing one piece of this list, the rig will feel improvised, and improvised rigs fail at 60 mph in a crosswind.
- Roof rack with two crossbars, or a soft rack strap kit for vehicles without factory rails. The spread between the bars matters more than the brand.
- Two cam straps, roughly 10 ft long, in 1 in or 1.5 in webbing, with metal cam buckles. Add a third if your kayak is over 12 ft or you drive mostly highway.
- Bow and stern lines, 10 to 15 ft of braided rope or strap with loops at each end. Paracord is too springy for this job.
- Padding — foam blocks, pool noodles cut to length, or soft cradles that wrap the hull where it meets the bar.
- Optional hardware — a ratcheting pulley on each line, a carabiner per line if you want to clip straight to a grab handle, and a roll of non-slip shelf liner for the roof contact points.
Before you climb anything, check three numbers. The roof load rating is stamped on the door jamb sticker on the driver’s side; most modern cars allow 100 to 165 lb with the factory rack, and a kayak plus gear often lands in the middle of that range. Then check the rack’s own rating, which is sometimes lower than the vehicle’s, and the weight of your kayak with gear in it.
Check the crossbar spread too. You want the bars close enough together that the kayak cannot pivot between them, and far enough apart that they sit under the hull rather than out near the ends where the deck is thin. On most sedans, a spread somewhere around 28 to 42 in works well for a typical recreational kayak.
If your car has no rack at all, you are not stuck. Soft rack straps that run through the door frames, or foam blocks braced with pool noodles, can carry a kayak on a short trip. That setup is common on commuter cars and holds up fine at highway speed as long as the lines are anchored properly. Just drive slower and check it more often.
Step-by-Step: How to Tie Down a Kayak on a Car Roof
Work from the front of the car to the back and finish with the front-to-back lines. The order matters because you cannot tension the bow line properly until the kayak is already held down by the cross straps.
1. Check Your Vehicle and Kayak
Open the driver’s door and read the roof load limit on the sticker before anything else. Compare it to your kayak’s listed weight, and remember that two people, paddles, a cooler, and a roof box all count toward that number.
Look at the rack itself. Clamp-on racks that grip the door frame need their torque set to the maker’s spec — too loose and the kayak works the bars sideways on a rough road. Door-rail racks need the door shut and latched before you tighten down, because the rail carries part of the load.
Inspect the kayak too. Confirm the grab handles are solid, since the bow and stern lines will hang off them, and find out what the hull is made of. Plastic boats flex, so overtightening leaves a permanent dent. Fiberglass is stiffer and more brittle, so a strap pressed into a sharp deck edge can cut into it. Inflatable boats need padded bars and gentler tension because the deck collapses under load.
Wipe the roof down while you are at it. Grit trapped under a foam block is what scratches paint, and a clean surface also keeps the rack from creeping during the drive.
2. Position the Kayak
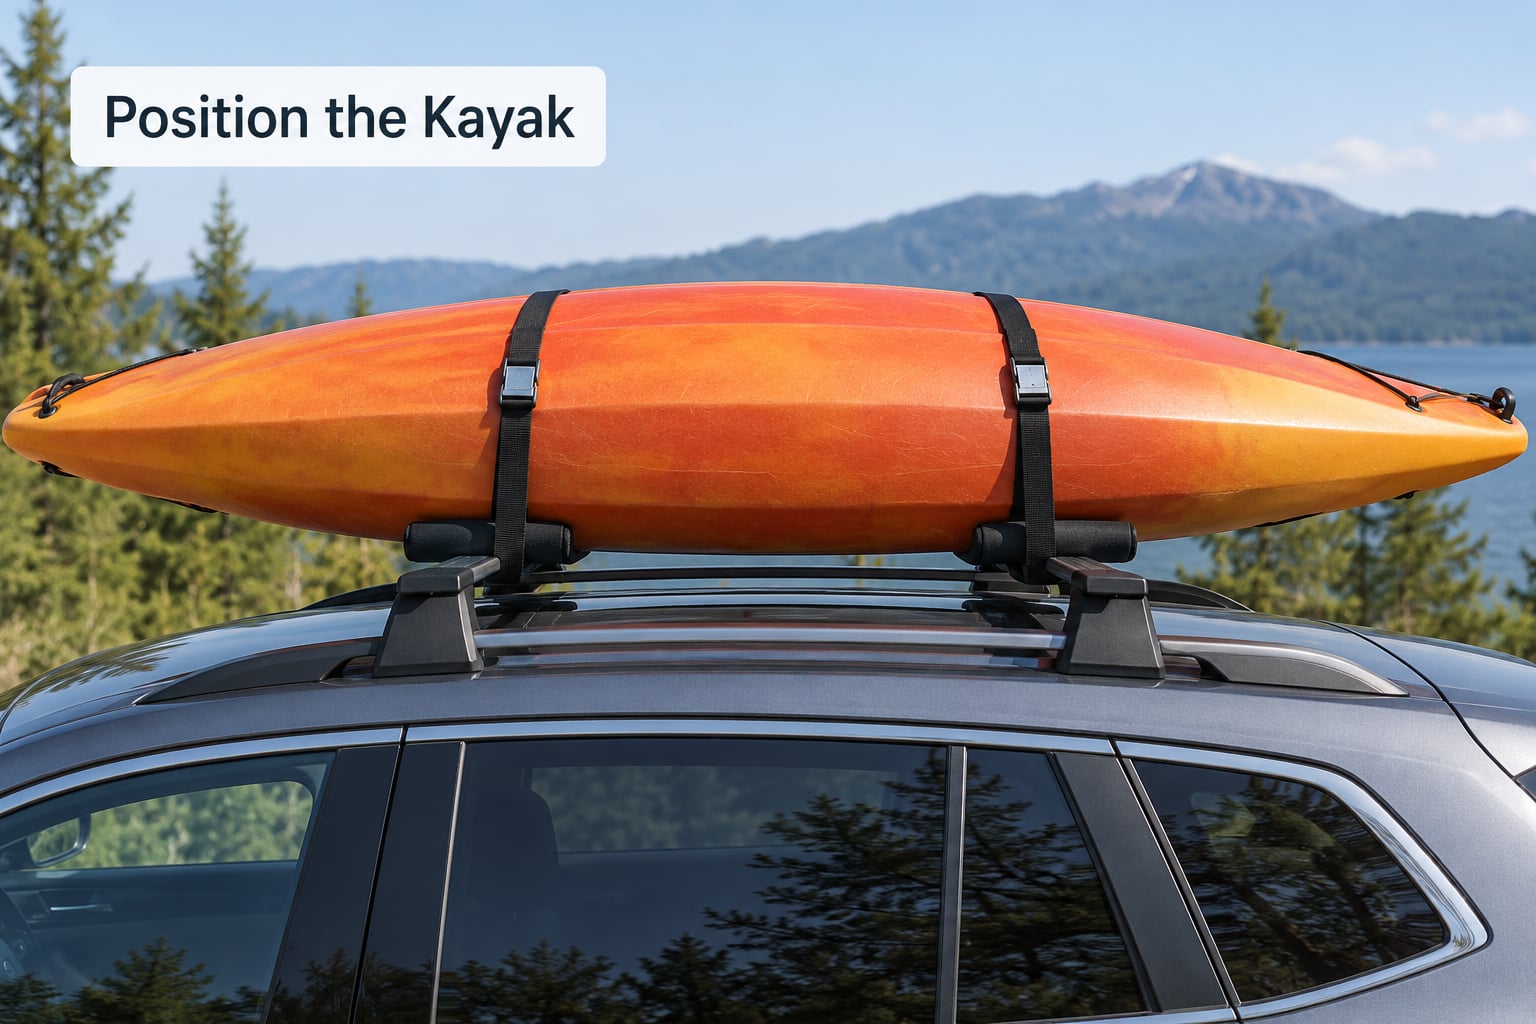
Set the kayak hull-side down with the cockpit facing forward or slightly angled. Laying it on its side flattens the hull and doubles the wind resistance, so it belongs on its belly every time.
Centre it over the crossbars and slide it fore and aft until the weight sits roughly between the front and rear axles. An overloaded rear axle makes the car fishtail in a crosswind, and this is the single most common reason loaded roof setups feel nervous on the highway.
Slide it until it clears everything. Doors must open fully without touching the hull, tailgate and rear hatch must work, and the antenna, roof box, and shark fin antenna need a couple of inches of daylight. The hatch rule matters most on wagons and SUVs, where a stern line run through the wrong place can stop the liftgate from opening at all.
Put your padding down first, then the kayak on top of it. Nothing on the hull should contact paint or bare metal. I like non-slip liner under foam blocks because it keeps the block from walking along the bar during a long drive.
3. Attach the Main Tie-Down Straps
Open the cam buckle fully, thread one end through it, and pull the tail down about 6 in before you close it. That tail is your handle later when you tighten.
Run the strap over the deck, down the far side, under the crossbar, and back up to the buckle. Keep the webbing flat the whole way. A strap folded back on itself, or twisted into a rope, loses a large share of its strength and will hum against the hull all day.
Pull the free end until the strap is snug enough that you cannot slide a finger under it, then a little more. You are aiming for firm, not compressed. If the hull visibly flattens under the strap, you have gone too far, and no amount of driving will bring it back.
4. Secure the Bow and Stern
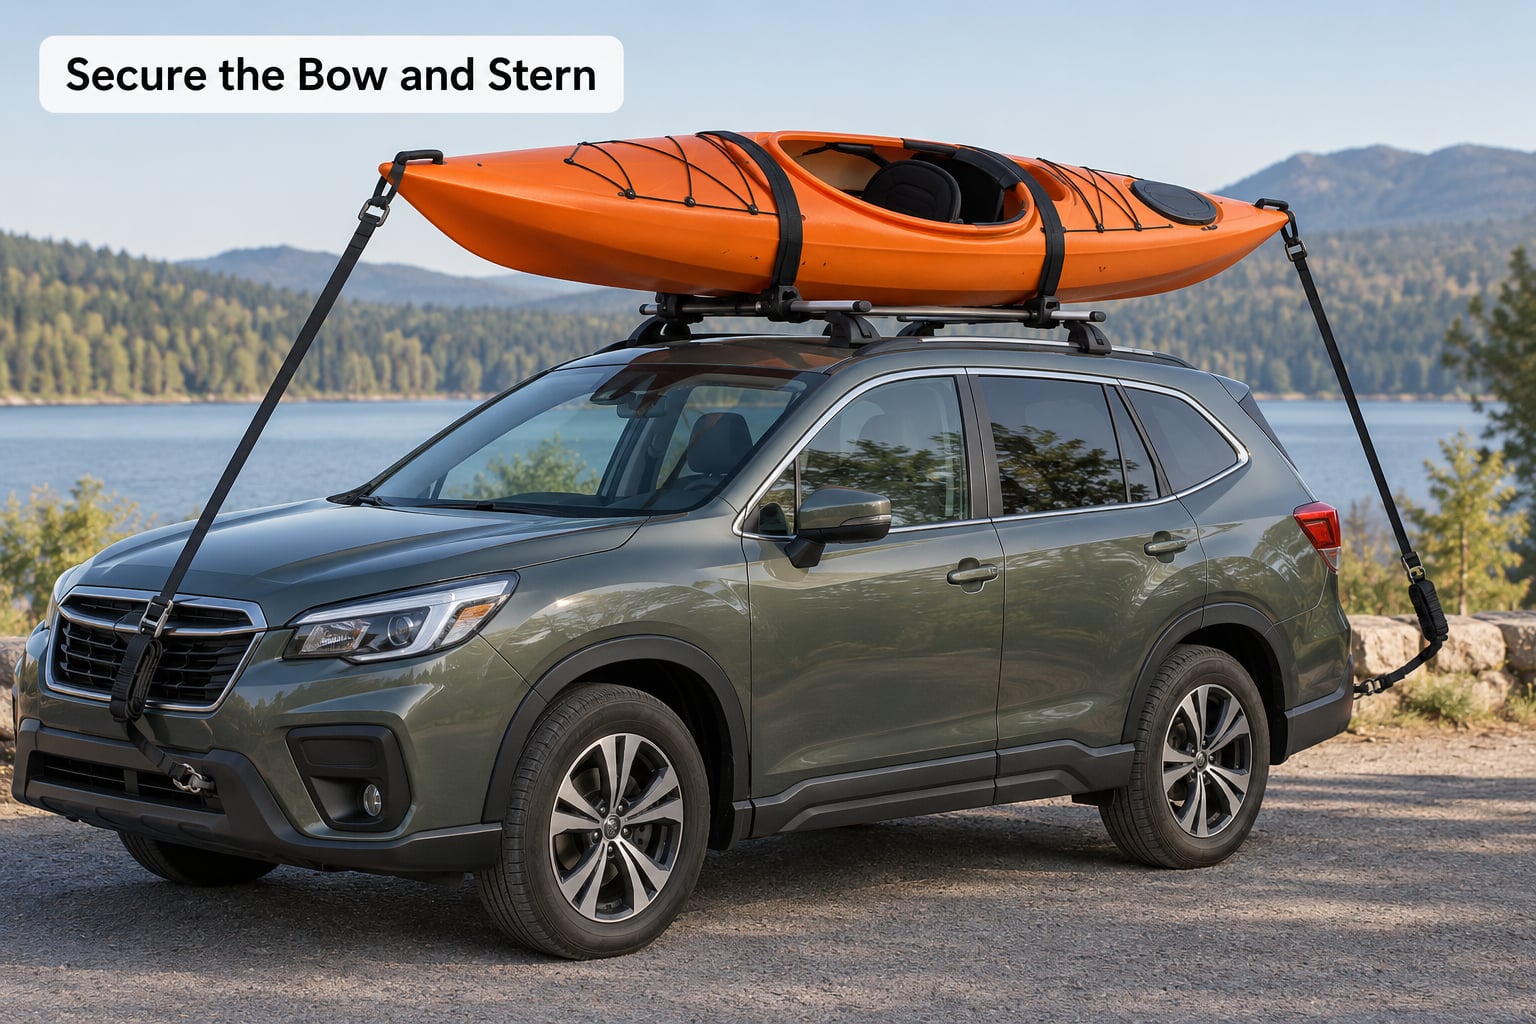
The cross straps stop the kayak from lifting straight up. Bow and stern lines stop it from lifting at one end and pivoting, which is what actually happens over a washboard or when you pass under an overpass at speed.
Clip or loop the front line to the bow grab handle and run it down to an anchor at the front of the car. Do the same at the stern. Leave enough slack to let the line cross the roof diagonally without sitting on the deck edge, where it would chafe the hull.
Use a trucker’s hitch when you want to tie it by hand with no hardware — two loops around the line and the post, then the working end through the loops and back to the anchor. If knot work is not your strength, a ratcheting pulley does the same job in one motion. Switching to ratcheting pulleys is the biggest single upgrade to a hand-tied rig, and it is the first change I would make.
| Strap or line | Strength and control | Hull safety | Best use |
|---|---|---|---|
| Cam strap with metal buckle | Steady, controllable tension | Forgiving; releases before the hull deforms | Cross straps over the deck |
| Ratchet strap | Very high, no give | Crushes and warps plastic hulls | Never use on a kayak |
| Bow and stern line, rope or webbing | Handles forward and rear lift | Touches only the grab handles | Front-to-back restraint |
| Bungee cord | Stretchy, inconsistent | Can skip over the hull | Never use as a tie-down |
Where you anchor matters more than what you anchor with. Use rated points only, and never route a line through a door hinge, over a brake light, or around anything that moves when the car does.
| Vehicle type | Front anchor | Rear anchor |
|---|---|---|
| Car with tow hook | Tow hook or recovery eye | Tow hook or recovery eye |
| Car without a tow hook | Grille post or hood hinge loop | Trunk loop strap or door frame loop |
| Wagon or SUV | Tow hook, or hood hinge loop | Tow hook under the bumper |
| Truck or SUV with a hitch | Recovery point at the bumper | Hitch receiver safety loop only if rated |
For a sedan with nothing factory-rated, paddlers loop rope around the vertical post that holds the front grille, and others tie under a hood hinge and leave the loop hanging in the hood gap so it clears when the hood opens. Both work, provided the line cannot reach the road and cannot flap against paint.
5. Tighten, Test, and Recheck
Now do the final tension pass. Push down hard on the kayak and rock it fore and aft; it should not shift at all. Lift the bow a few inches and let it drop — if it bounces and settles, the bow line is doing its job.
Then do the shake test. Grab the bar and shake the car as hard as you reasonably can. Any movement you can hear or feel is movement you can find on the shoulder of the road instead.
Check each fastener, tug every line, and look at the strap tails. Trim the excess or tie it off so nothing hangs loose to slap the door. If a flat strap hums at highway speed, put a single half-twist into the free section and the vibration disappears; that trick comes up over and over with paddlers.
Drive the first ten minutes slowly, then recheck at every fuel stop. Straps settle after the suspension warms up, and a boat that was snug at the launch can be loose an hour later. Steady your speed too — aerodynamic drag climbs with the square of speed, so 70 mph costs far more than the last twenty miles of a long drive.
Common Mistakes and Fixes
Almost every failed tie-down falls into one of these patterns. The symptom tells you which one you have.
| Symptom | Cause | Fix |
|---|---|---|
| Kayak hums or vibrates at highway speed | Flat strap has no twist, or strap tails flap | Add a half-twist to the free section and tie off tails |
| Dull grooves or cut marks on the hull | Strap runs on bare hull without padding | Add foam blocks or pool noodle sections, move the strap off sharp deck edges |
| Strap slowly loosens on the road | Bar and strap move on a dirty or smooth roof | Clean the roof, add non-slip liner under the padding |
| Car feels twitchy in a crosswind | Weight too far back, or kayak overhangs past the bars | Slide the kayak forward, centre it between the axles, shorten the overhang |
| Hull visibly flattened under a strap | Overtightening, often with ratchet straps | Back the buckle off until the hull rounds out; replace ratchet straps with cam buckles |
| Bow lifts over bumps | No bow line, or it is anchored loosely | Anchor the bow line to a rated point and tension it until the bow stays down when lifted |
| Strap slides sideways on the bar | Twisted webbing or a fold in the strap | Untangle, flatten the webbing, and re-run the strap |
| Line rubs paint or flaps on the door | Too much slack, or a bungee used as a line | Tension the line and tie the tail; swap the bungee for a proper bow and stern line |
The one mistake I would never let slide is a bungee cord standing in for a cam strap. It bounces over the deck, skips off on bumps, and never holds steady tension. Cord has no place in this setup.
A few trip-specific notes. If you are driving home with a wet hull, run a quick rinse before you strap down, because salt water under a strap etches the deck in a single afternoon. Rinse sand off the foam blocks too, since grit under a block is what puts scratches in paint.
For coastal and long-distance trips, recheck at every stop rather than every few hours, and keep a spare cam strap in the car. On gravel and forest service roads, drop your speed enough that the kayak is not bouncing, and recheck the cross straps after the first mile of washboard.
Frequently Asked Questions
Can you use ratchet straps to tie down a kayak?
No. Ratchet straps apply far more force than a kayak needs and will crush, dent, or permanently warp a plastic hull, and they can crack a fiberglass deck. Cam straps with metal cam buckles hold a kayak securely and release before the hull deforms. Plenty of paddlers have never needed ratchet straps for a boat at all.
Are bow and stern lines really necessary for a kayak?
They are what stop the boat lifting at one end and pivoting over bumps or under an overpass. Two well-secured cam straps handle side-to-side and vertical movement, but the cross straps alone leave the bow and stern free to rise in a crosswind. If your roof rack manufacturer does not require them, treat them as the difference between a boat that feels solid and one that never stops worrying you.
How tight should kayak straps be before I crush the hull?
Tight enough that you cannot slide a finger under the webbing, then stop. The hull should still look rounded when you check it from the side. If it flattens under the strap, release tension until it recovers. On a long drive, re-tighten after about ten minutes because straps settle, and recheck at every fuel stop from then on.
How far can a kayak overhang the roof, and do I need a flag?
Overhang rules are set by the state you drive in, not by your kayak, and the common limits are about 6 ft from the rear of the vehicle and a red flag or cloth marking anything extending past the rear. A properly secured boat on a rated rack counts as cargo in most states. Check your state rules before a long haul.
How do I transport a kayak without a roof rack?
Two methods work. A soft rack kit uses straps through the door frames with the doors closed and latched, plus bow and stern lines to bumper or grille anchors. Foam blocks or pool noodles braced between the doors work over a longer roof. Both carry a kayak fine at highway speed, though short two-door roofs can bend the ends and you should drive slower and check the rig more often.
Do I need to recheck the straps while driving?
Yes. Recheck about ten minutes after you leave, because straps and rack hardware settle as the suspension warms, then at every fuel stop or rest break on a long drive. A quick check means pressing down on the hull and lifting the bow to confirm it stays put. It takes under a minute and catches the loose strap before it becomes a problem on the shoulder.
Start with the middle: set the kayak hull-side down, centred between the axles, padded where it meets the bars. Two cam straps, flat and firm but not crushing. Bow and stern lines to rated anchor points at each end of the car. Shake the car, lift the bow, drive the first ten minutes slowly, then check again at every stop. That is the whole rig, and it holds all the way home.