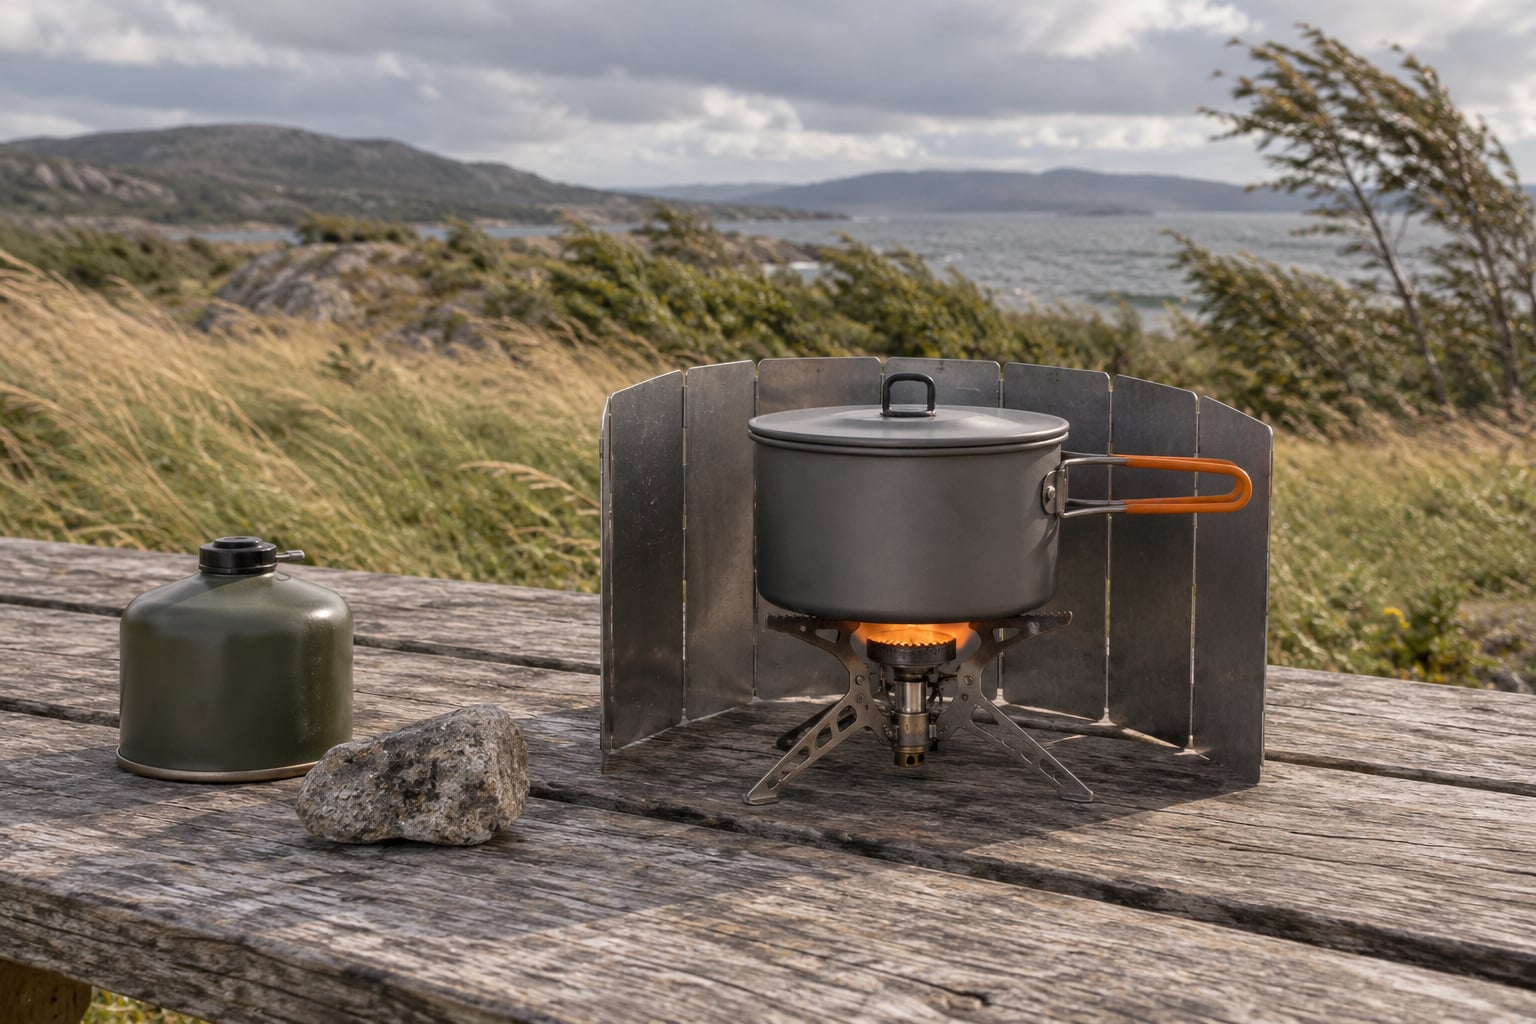
Cooking over a camp stove in wind comes down to one move: put the burner on the lee side of something solid, wrap a windscreen around the upwind side about 6 to 8 inches from the flame, and run the valve lower than you would on a calm night. Wind does not just blow your flame out, it strips convection heat off the pot before the heat ever reaches your food, so a sheltered setup cuts boil times and fuel use at the same time. Expect the whole method to take five minutes of setup and a bit more attention at the valve than calm-weather cooking.
I’ve cooked enough meals on windy ridgelines to know the pattern. The stove never fails because the burner is weak. It fails because the setup was improvised after the flame was already hissing in the dark, and nobody sealed the bottom edge of the screen.
Table of Contents
- What You Need
- A stove and fuel matched to your trip
- A windscreen, bought or built
- A stable base and cookware with a lid
- A food thermometer and basic fire gear
- Step-by-Step
- Step 1: Choose a sheltered cooking spot
- Step 2: Stabilize the stove and shield the flame
- Step 3: Start the burner and manage changing wind
- Step 4: Cook food safely and check your target
- Step 5: Shut down and leave the site safe
- Common Mistakes
- Cooking in an exposed spot because it’s convenient
- A windscreen that blocks the air the stove needs
- A loose or uneven base
- A pot overhanging the burner
- Ignoring flame failure and cooking around it
- Skipping the thermometer
- When the flame keeps blowing out: work this sequence
- What wind speed you are actually dealing with
- Cooking in wind and rain together
- What to cook when it’s windy
- Frequently Asked Questions
- How far from the burner should a windscreen be?
- Why does my camp stove flame keep blowing out in the wind?
- Is it safe to cook under a tent awning or in the vestibule?
- How can I make a DIY windscreen for my camping stove?
- How do I use a camping stove in the rain?
- How much extra fuel does cooking in the wind use?
- Conclusion
What You Need
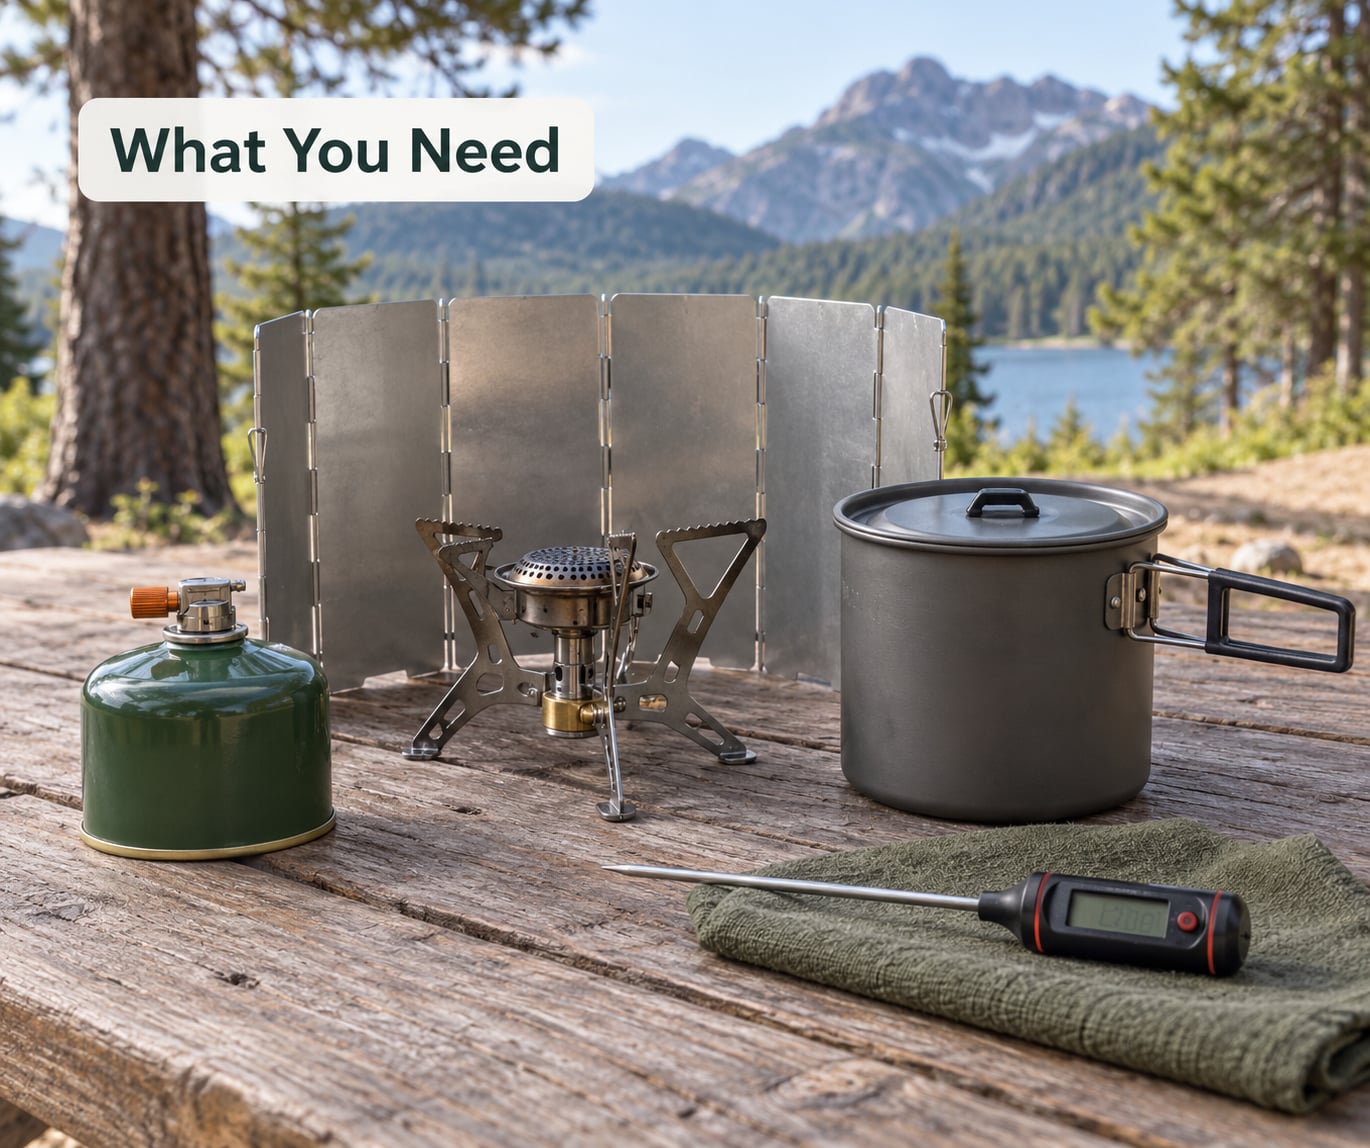
Most of this you already own, and the version you need depends heavily on whether you’re on a day hike, walking in with a pack, or driving to a site and unpacking.
A stove and fuel matched to your trip
For a day hike or a car camp, a two-burner propane or butane stove gives you a wide, low burner head and a drip tray that stays planted in a crosswind. For backpacking, an integrated stove with a heat exchanger and built-in windscreen panels holds its flame better than a bare canister burner, because the panels sit close to the burner ports on three sides.
Liquid or multi-fuel stoves run coolest and most steadily in wind and cold weather, which matters more in the mountains than anywhere else. Alcohol stoves are the opposite choice. They’re nearly impossible to keep lit in anything you’d call cooking weather.
A windscreen, bought or built
A folding aluminium windscreen is the standard answer and worth the weight. Anything rigid works just as well: a sheet of aluminium cut from a coffee can, a piece of heavy-duty foil doubled over a rock, or a spare pot lid propped on two stones. I’ve cooked behind a car door panel at a trailhead and behind a digging shovel at a snow camp, and both held a flame that a bare burner could not.
Natural windbreaks are free and often better than packed gear. A log, a boulder, a snow bank, your own backpack, or the vehicle body all act as a windbreak. Two people carrying a foam sleeping pad have more than enough panel to close the gaps that let wind creep in.
A stable base and cookware with a lid
Set the stove on bare ground, bare rock, or a solid table surface, never on soft duff, dry grass, or a folding camp chair. A wide pot with a flat bottom and a metal lid gives you a stable center of gravity, and the lid doubles as an extra shield when the wind shifts.
A food thermometer and basic fire gear
Wind burns fuel faster and tempts you to leave things on high, so a probe thermometer is the difference between dinner and a foodborne illness. Keep a lighter or a firestarter in reach, a water bottle for dousing, and check whether your area has an active fire ban before you ever click the igniter.
Step-by-Step
Step 1: Choose a sheltered cooking spot
Stand still for a few seconds and feel where the air is coming from. Campers call the protected side the lee, and cooking happens there. Face into the wind and your body becomes a windbreak on its own, which is the oldest technique in the book and the one most people forget.
Look for a low, level spot out of the main flow, near a boulder, a deadfall log, a bank, or the back of your vehicle. Stay off exposed ridges and open shoreline. Check three things before you set anything down: no dry grass within the clearance your local rules require, no hanging dead branches overhead, and a good arm’s length from any tent wall or fabric awning.
If nothing nearby works, dig. Setting the stove below grade with a shovel standing across the upwind side is a proven way to cook in a blizzard.
Step 2: Stabilize the stove and shield the flame
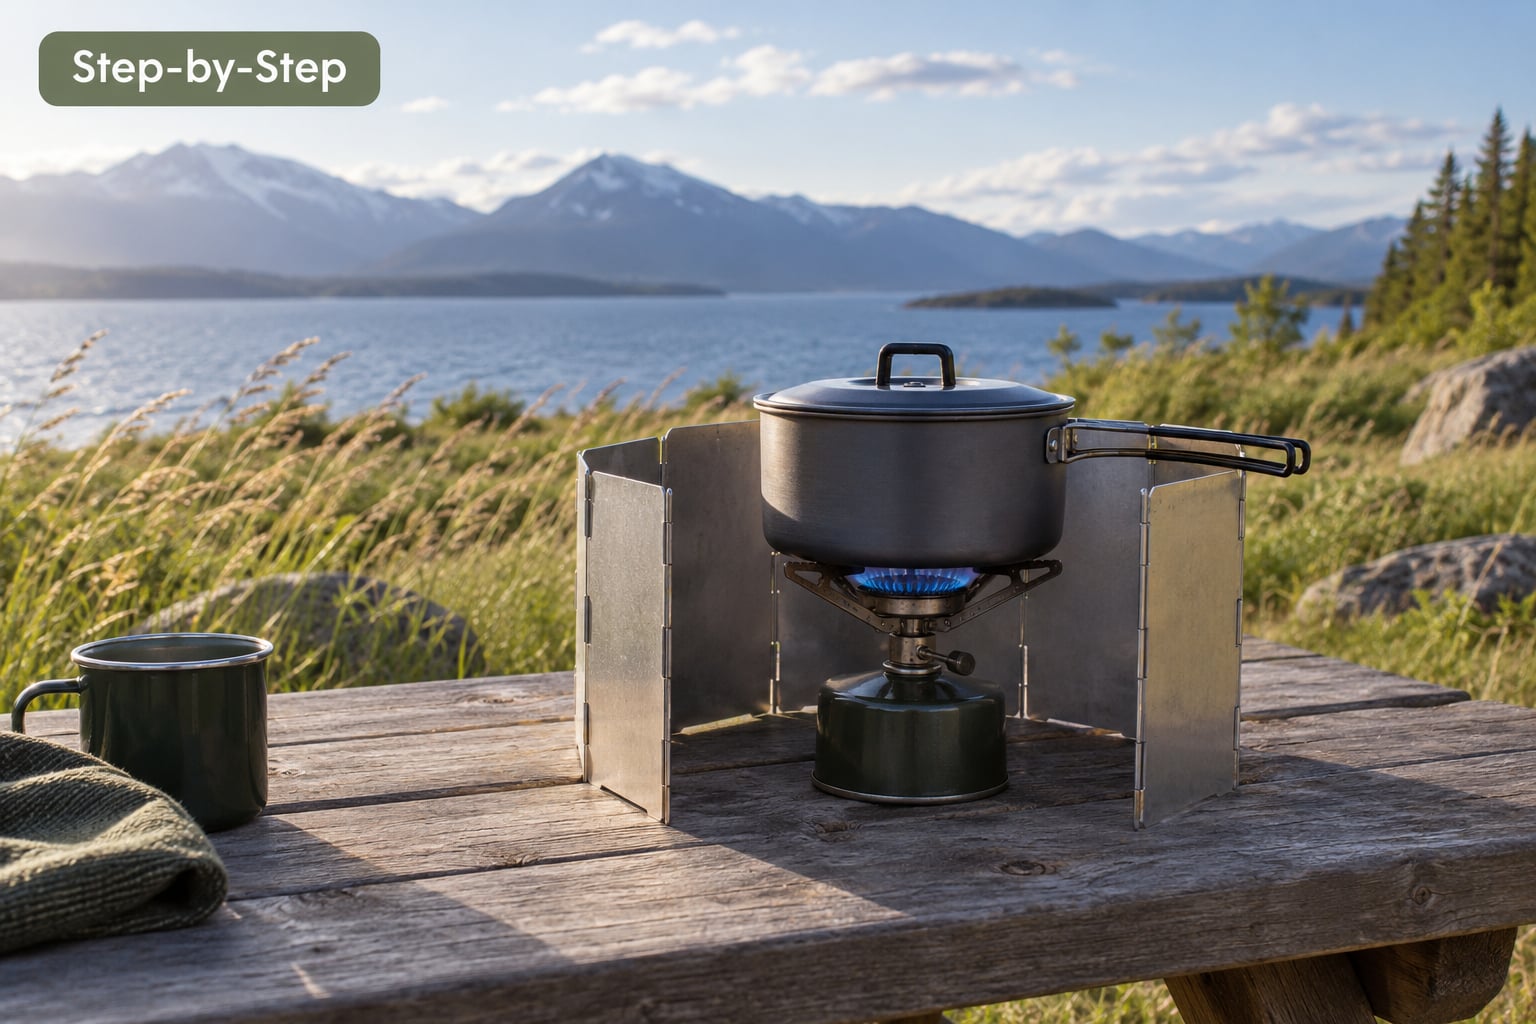
Place the stove on the firm surface, then set the pot on before you light anything. A burner with no pot above it has nothing to weigh it down and will rock. Center the pot over the burner so the handle doesn’t swing you off balance, and if you’re on soft ground, put a rock or a cut piece of log underneath to spread the load.
Now build the wall. Curve the windscreen into a wide semi-circle on the upwind side only, leaving the downwind side open so combustion gases and heat can escape. Six to eight inches from the burner is the working distance, roughly a hand’s width. Closer and you can overheat the burner or trap pressure in a canister stove, which forum users warn about repeatedly. Farther and the screen does nothing.
The gap everyone forgets is underneath. Fold the bottom edge of the screen down, tuck it under the pot’s footprint, or pack a rock along the base to stop wind creeping in under the panel. Seal the vertical joints too. Folding screens are three panels and every hinge is a leak, and the flame will find those gaps and lick around the edges until it reaches open air.
Step 3: Start the burner and manage changing wind
Ignition is easiest in a lull. Wait for the gust to pass, press the igniter, and light with the valve at medium rather than wide open. Immediately turn the valve down until you can hear a steady roar rather than a hiss. A flame that is too tall for the windscreen will find the top edge.
Learn the three signs that the flame is losing its fight: the tip leans sideways, the roar drops to a whisper, or the flame drops below the burner ports and clings to them. All three mean the screen is leaking or the wind has shifted.
When the wind changes, do these in order. Rotate the windscreen so the wide panel faces the new direction. Shift the stove deeper into the lee of whatever is shielding you. Add a second block, your pack or a spare pot lid, on the newly exposed side. And if the gusts are still winning, turn the valve to low, wait thirty seconds for a lull, and relight before the pot goes cold.
For the whole meal, stay within arm’s reach. Wind gusts can change fast enough to move a flame sideways, and a burner with a pot on it does not tip, but an unattended one in dry grass is a real problem.
Step 4: Cook food safely and check your target
Wind robs heat from the sides of the pot, so adjust your technique rather than fighting it. Keep the lid on while you bring water to a boil, use a wider and deeper pot than usual, and hold a steady medium simmer instead of chasing a rolling boil that the wind will keep stealing.
Stir more often than you think you need to. A flame pushed hard against one side of the pot scorches that side while leaving the rest cold, and stirring is the cheapest fix there is.
Check the temperature instead of guessing at it. USDA minimum internal temperatures are 165°F (74°C) for poultry, 160°F (71°C) for ground meat, and 145°F (63°C) for whole cuts of meat and fish. Probe the thickest part, not the edge, and pull the probe straight out so you don’t carry heat along with the reading.
Step 5: Shut down and leave the site safe
Close the valve completely and hold it a few seconds. Let the burner cool before you touch it, since a thin flame-free burner can still be hot enough to blister you. Follow the manufacturer’s instructions for your fuel type on warming, disconnecting, or inverting the canister; remote-canister setups have their own order for the hose and the line.
Once everything is cold, walk your cooking area and the downwind side of it. Wind carries embers and drips further than you’d plan for, and it takes about a minute to make sure you left nothing behind.
Common Mistakes
Cooking in an exposed spot because it’s convenient
The fix is to move before you light, not after the flame dies. Two minutes spent relocating saves the whole meal.
A windscreen that blocks the air the stove needs
A screen that wraps all the way around, or one laid flat like a lid, starves the burner and traps heat. Keep the downwind side open and vents facing down, and never fully enclose a canister stove.
A loose or uneven base
Duff, moss, and folding chairs tip or compress. Bare ground, rock, or a table. If nothing else works, put your pack down and cook on it.
A pot overhanging the burner
Balance the pot so its heaviest point sits over the burner head. An offset pot tips in a gust and takes the flame with it.
Ignoring flame failure and cooking around it
Once the roar drops to a whisper, the burner is already struggling. Fix it before you stir it again.
Skipping the thermometer
Wind cooks unevenly, and uneven cooking is exactly where underdone centers hide.
When the flame keeps blowing out: work this sequence
- Check the gap under the windscreen edge and seal it first.
- Confirm the screen is 6 to 8 inches from the burner and curved on the upwind side.
- Close the panel joints so no vertical gap reaches the flame.
- Turn the valve down to a medium-low flame rather than high.
- Relocate the stove deeper into shelter, or add a second windbreak.
- Wait for a lull, then relight. If it fails repeatedly, switch to boiling water and eating cold or ready-to-eat food.
What wind speed you are actually dealing with
These are practical bands, not instruments. Use them to decide how hard to work at setup.
- Light air to a light breeze, roughly 1 to 7 mph: most stoves cook fine with no screen at all.
- Light to gentle breeze, roughly 7 to 12 mph: a folding screen or a single rock is usually enough.
- Moderate breeze, roughly 12 to 19 mph: a proper screen with sealed edges, or move behind a vehicle or boulder.
- Fresh to strong breeze, roughly 19 to 31 mph: expect repeated flame failure and boiling water instead of cooking.
- Near gale and above, roughly 31 mph and up: don’t cook. Eat ready-to-eat food and wait it out.
Cooking in wind and rain together
Rain makes it worse, because you can’t use a sheet of foil alone without blocking ventilation, and wet fuel connections leak more heat into the air than into your pot. Get a full awning or a vehicle over the stove first, then add the windscreen underneath as the second layer. Keep the pot lid on to stop rain dropping the temperature, and put the fuel canister inside a bag or your sleeping bag so it stays near body heat. A cold canister has less pressure and a weaker flame, which is the last thing you need.
What to cook when it’s windy
One-pot meals, instant noodles, oatmeal, soup mixes, and rehydrated freeze-dried dinners all work. What fails is searing, anything that needs a sustained high flame, and anything requiring several burners running at once. Cook once, eat twice, and use the second portion cold the next morning.
Frequently Asked Questions
How far from the burner should a windscreen be?
About 6 to 8 inches, roughly a hand’s width. Closer than that and you can overheat the burner or trap pressure around a canister stove, which is the safety issue people repeat most often on camping forums. Farther out and the wind reaches the flame before the screen has done anything. Curve the screen as a wide semi-circle on the upwind side and seal the bottom edge so air cannot slip underneath it.
Why does my camp stove flame keep blowing out in the wind?
Wind strips the combustion envelope away from the burner ports and physically bends the flame off the fuel source. A flame that leans sideways, drops to a whisper, or clings below the burner ports is already losing the fight. Most often the cause is a gap under the windscreen edge or an open panel joint, not a weak burner. Seal the bottom, curve the screen upwind at the right distance, turn the valve lower, and try again in a lull.
Is it safe to cook under a tent awning or in the vestibule?
It can be, with care. Fabric awnings block overhead gusts well but still leak air at burner level, so a separate windscreen underneath makes a big difference. Position the stove on the side of the awning away from the prevailing wind so the canopy pushes air past rather than down onto the flame. Never cook inside a closed tent, keep the stove well away from tent walls and guy lines, and never leave it unattended.
How can I make a DIY windscreen for my camping stove?
Cut a rectangle of aluminium or heavy-duty foil roughly 16 by 12 inches, bend the bottom few inches to a right angle so it can sit flush on the ground, and shape it to a wide curve on one face. Drill or fold small tabs at the ends so the panels can meet and overlap, then fill the gaps with a folded strip of foil or a strip of leather. A doubled spare pot lid propped against two rocks does the same job with no cutting at all.
How do I use a camping stove in the rain?
Get a full awning or a vehicle over the stove first, then treat the windscreen as your second layer of protection rather than your only one. Keep the lid on to hold heat, keep the burner settings low and steady, and store the fuel canister inside a bag or your sleeping bag so it stays near body heat and keeps its pressure. Wipe the connection dry before lighting and never run a burner in a fully enclosed space.
How much extra fuel does cooking in the wind use?
There is no fixed number, because fuel use tracks how long the burner runs, and in wind the burner runs longer. Heat leaves the pot sideways instead of straight down, so water takes noticeably longer to boil and a simmer needs more valve time. Inverting the canister and warming it in your hands improves cold-weather performance, and cooking in the lee of a rock or vehicle cuts the loss far more than turning the valve down does.
Conclusion
When the wind picks up, do these four things in order: move to a lower, more sheltered spot on the lee side, set the stove on something firm with the pot already seated, seal a windscreen about 6 to 8 inches upwind on a wide curve, and turn the valve down. Add a thermometer and finish food to temperature rather than to appearance. Cook fast, cook simple, and keep your hands on the valve until the burner is cold.