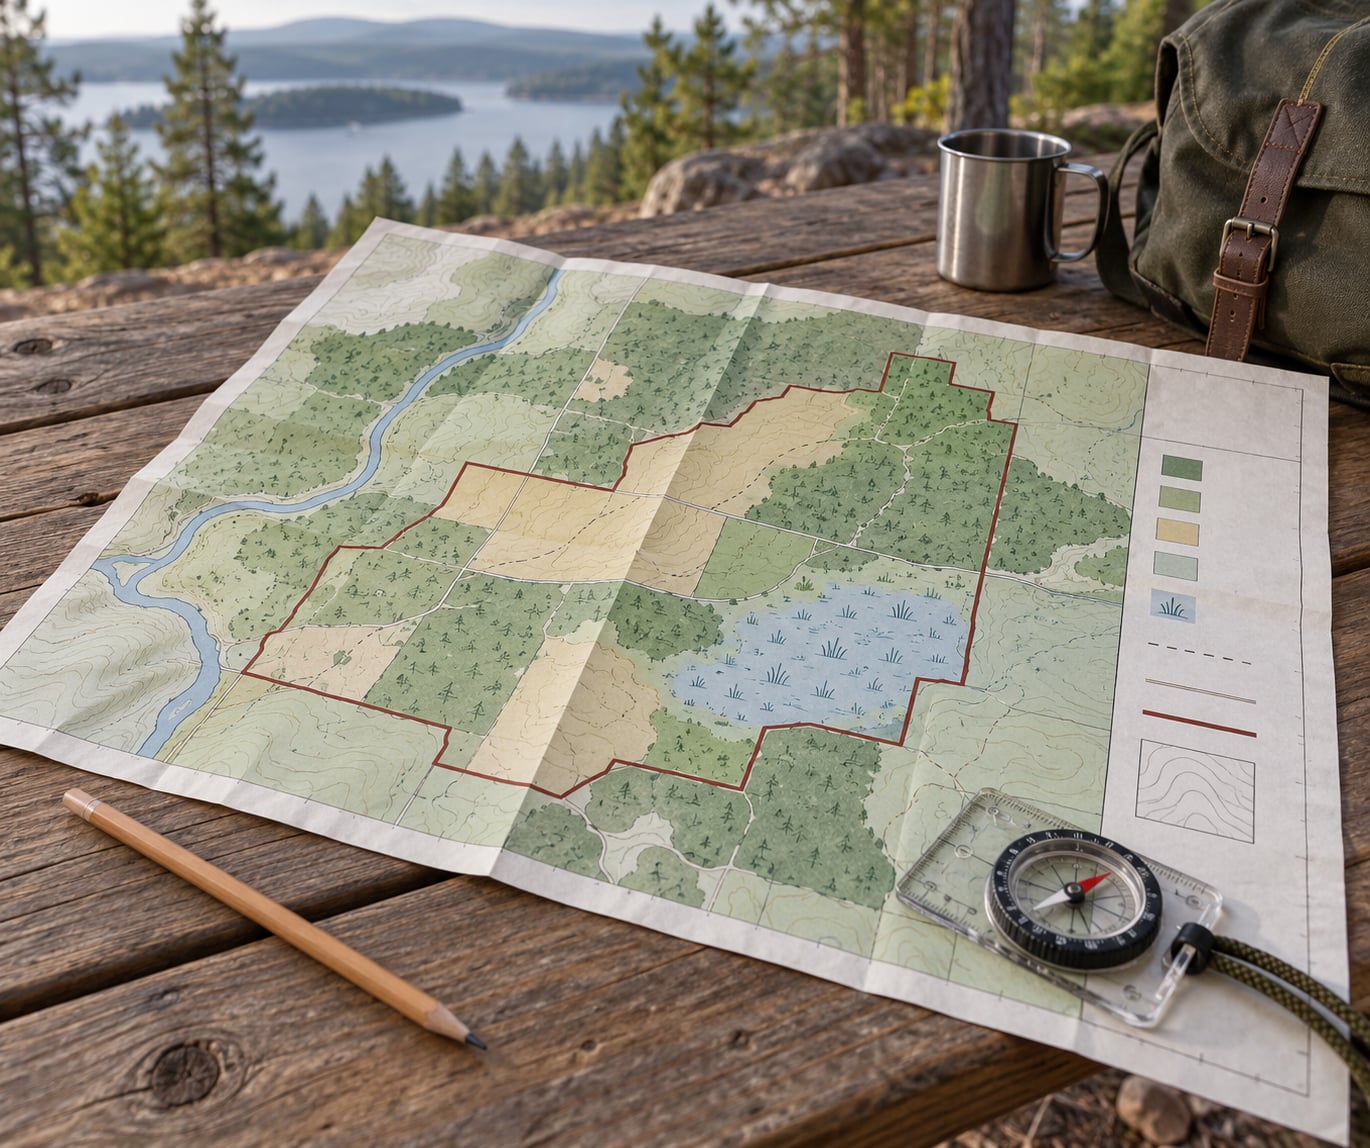
A wildlife management area map is the official agency sheet that shows where a state-managed tract of land begins and ends, how much of it is habitat versus open water, which roads and gates you may drive, and which parts are closed this season. Reading one takes about fifteen minutes of setup: find the current edition, decode the legend, fix your position using the scale and north arrow, then work outward to your hunt zone, your access route, and the restrictions that apply where you plan to stand.
The mistake almost everyone makes is starting at the roads. Start at the legend instead. Everything else on the sheet — colors, line weights, dashed fills, block numbers — is meaningless until you know what the agency is telling you with them.
This guide works for state wildlife management areas, game management areas, and state wildlife areas across the country. Conventions differ by agency, and that is exactly why the legend has to be step one.
Table of Contents
- What You Need
- Step-by-Step
- Start with the map title, date, and scale
- Decode the legend and map symbols
- Read the habitat and land-cover patterns
- Locate access points and route options
- Check boundaries, ownership, and regulations
- Match the map to current field conditions
- Common Mistakes
- Frequently Asked Questions
- What is the first thing to look for on a wildlife management area map?
- Are all roads and trails on a wildlife management area map open to the public?
- How can I tell whether a map symbol is a public access point?
- Can I use a wildlife management area map with offline GPS?
- Why does a management area map show closures or seasonal boundaries?
- How do I use a map to plan around tides and weather?
- Conclusion
What You Need
Most of the gear is free or already in your pack. The only thing that is genuinely hard to replace on the trail is the map itself.
- The current official map. Pull the brochure or PDF from your state wildlife agency, not a screenshot a stranger posted in a hunting group. Filings from two or three editions ago are the single most common source of wasted trips.
- The current regulation booklet or web page. The map tells you where. The regulations tell you what you may do there, and they change more often than the map does.
- A GPS unit or phone with offline maps downloaded. Download the area before you leave coverage. I have watched a phone drop signal exactly where a boundary turns and an arrow becomes the only evidence.
- A compass. A baseplate compass with a declination adjustment works under canopy when a handheld GPS will not lock a position.
- Pencil and a waterproof sleeve. Pencil marks erase when conditions change, which they will. Ink does not.
- The agency’s office number. Save it to your phone. When the map and the sign disagree, the number settles it in five minutes instead of five hours.
Optional but useful: a county plat map for the township and range covering the area, and a second screen showing satellite imagery. Imagery is a fast way to spot old clearcuts, overgrown lanes and water that a printed sheet may not show.
Step-by-Step
Start with the map title, date, and scale
Look at the top and bottom edges before you look at the middle. Every agency brochure carries a revision or print date somewhere, usually in small type near the legend or in the footer, and that date tells you whether closures you are reading are current.
Next find the scale. A bar scale in feet or meters tells you how far apart features appear compared to real distance. On a quarter-inch-per-mile sheet, a road that looks like a short hop on the page is most of a mile in the field. Get that ratio wrong and every scouting decision downstream goes with it.
Then find the north arrow. It is not always at the top of the page. Agency cartographers rotate sheets to fit the shape of the property, and on an odd-shaped WMA the map can be printed with north pointing sideways.
How do you know the sheet is detailed enough to navigate? Check whether the roads you care about are named or numbered, and whether the access points you need appear as symbols rather than a vague smudge. If the map does not show the road you plan to use, treat it as unverified until you confirm it another way.
Decode the legend and map symbols
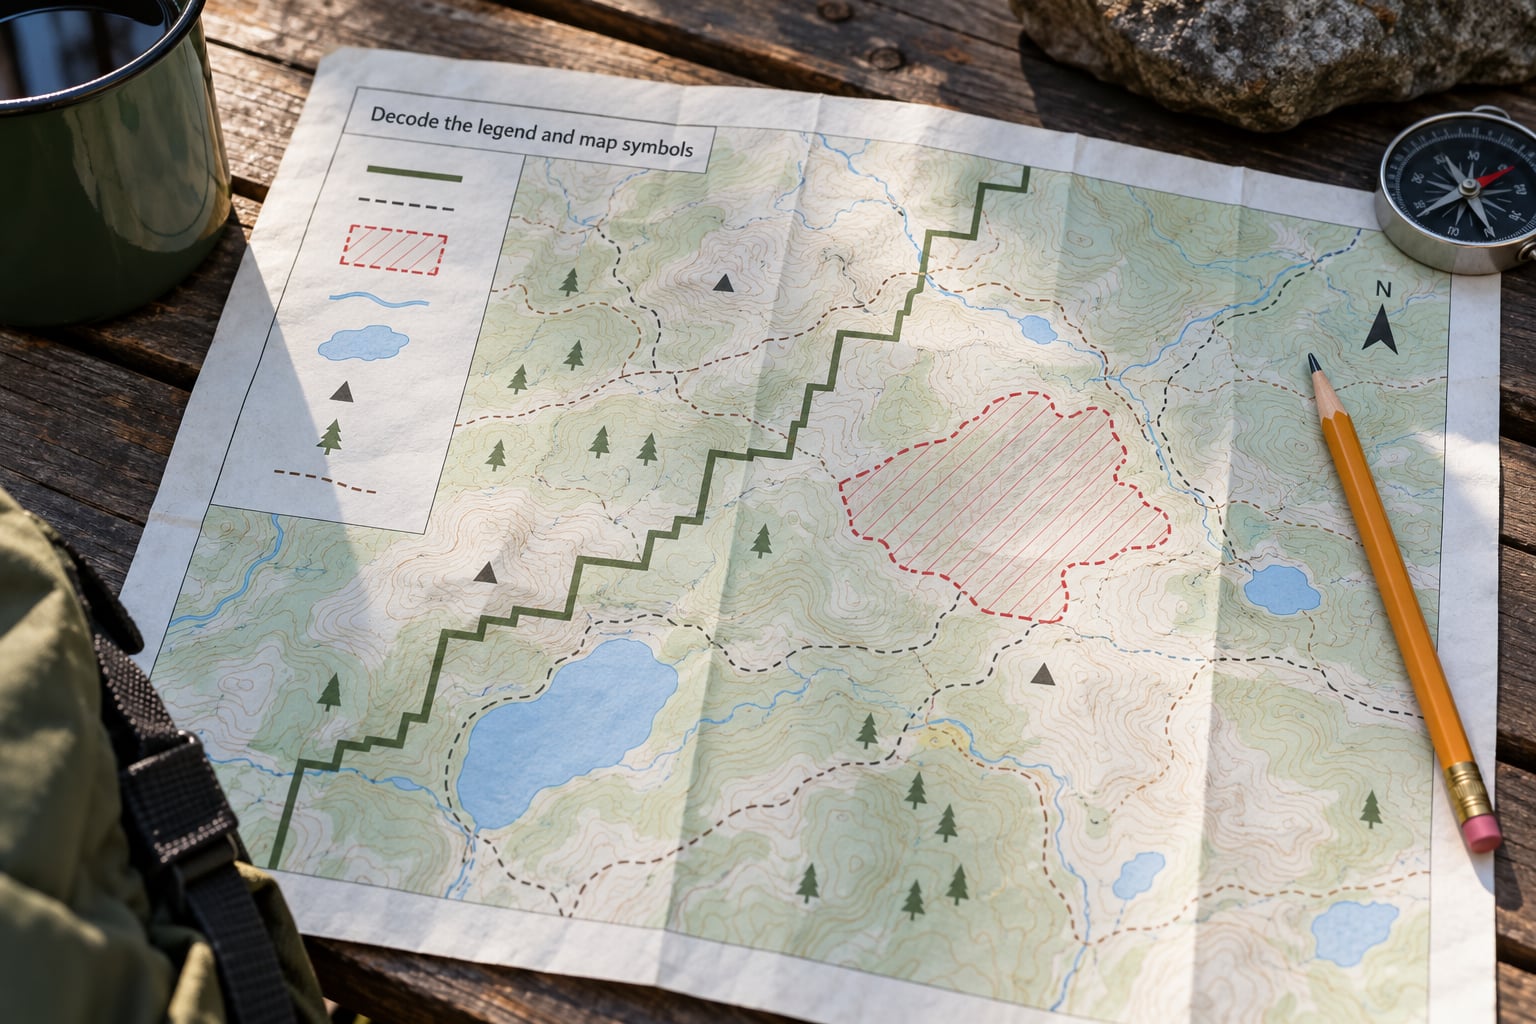
The legend is the decoder ring for everything else on the sheet. Read it fully before you read the map, including the parts that do not apply to what you came to do.
Colors are the least portable part of a WMA map. A solid or blotched orange fill commonly marks land closed to hunting or closed entirely for a season, but plenty of agencies use orange for something else, and a few print closures in a hatched pattern with no color at all. The legend is the only authority on what the color means in your state.
The symbol table below covers what shows up on most agency sheets. Treat it as a starting vocabulary, not as a substitute for the legend printed on your map.
| Symbol or line style | What it usually means | What to do about it |
|---|---|---|
| Heavy solid boundary line | Outer boundary of the management area | Everything inside it is agency land, subject to the rules in the booklet |
| Dashed or dotted inner line | Tract, hunt zone, or sub-area boundary | Regulations change when you cross it, even though the agency does not |
| Gate symbol at a road | Controlled entry, sometimes seasonal | Note whether it reads open or closed, and expect it to differ from the brochure |
| Small square or P | Parking area | Confirm it is open year-round before you build a route around it |
| Boxed symbol at a trailhead | Check-in kiosk, sign-in station, or self-issuing permit station | Stop there even if no one is around; sign-in requirements are strictly enforced |
| Solid line versus dashed line | Maintained road versus track, old logging road, or seasonal route | Most agencies allow motor vehicles only on designated roads |
| Hatched or stippled fill | Marsh, wetland, or seasonal flooding | Plan for a walkout and expect the ground to change with water levels |
| Solid block fill in a distinct color | Closed to hunting or closed for the season | Do not enter for the closed activity; some closures apply to all entry |
| Small circle or T on a line | Powerline, pipeline, or other utility corridor | A reliable handrail, but a common source of boundary confusion |
Also read the map notes, the small block of fine print in the corner. It carries revision history, amendment notices and contact numbers, and it is where agencies bury changes printed after the original brochure went out. Almost nobody reads it, which is why it regularly settles arguments in the field.
Read the habitat and land-cover patterns
Once the legend is decoded, the map starts telling you what you will be walking through. Marsh symbols mean open, wet ground with poor sightlines and steady bird movement. Contour lines close together mean steep ground that will slow you down and cost you time you probably budgeted wrong. Widely spaced contours mean gentle terrain that lets you move quietly.
A few land features matter more than the rest when you are deciding where to spend a morning. Saddles are the low points along a ridge and act as natural funnels. Drainages and creek crossings concentrate movement. Benches and points give you a view downslope into country you would otherwise have to walk blind.
On management areas, habitat is not decoration. Prescribed burn units, pine flatwoods and hardwood bottoms get managed on a rotation, and the management tract names on the map often tell you which habitat block you are standing in. That is useful context for scouting, since a tract boundary can explain why one end of the walk feels different from the other.
Locate access points and route options
Map the route from the pavement before you plan the walk. Start at a parking symbol or named public road, note the gates between you and your destination, and check whether each road on your route is drawn as a maintained road or as a dashed track.
Most agencies restrict motor vehicles to designated roads, and the map is usually the only place that list appears. Hunters say it constantly: the map does not tell you where you can drive until you read the notes. On some areas, road access is further limited to a season, to a certain vehicle class, or to the hours around a gate.
Build in an exit. Pick two ways out of the drainage rather than one, and mark both on the map. If a storm drops water across the low road on your way in, you will want a second plan that does not cross the same flooding.
Check boundaries, ownership, and regulations
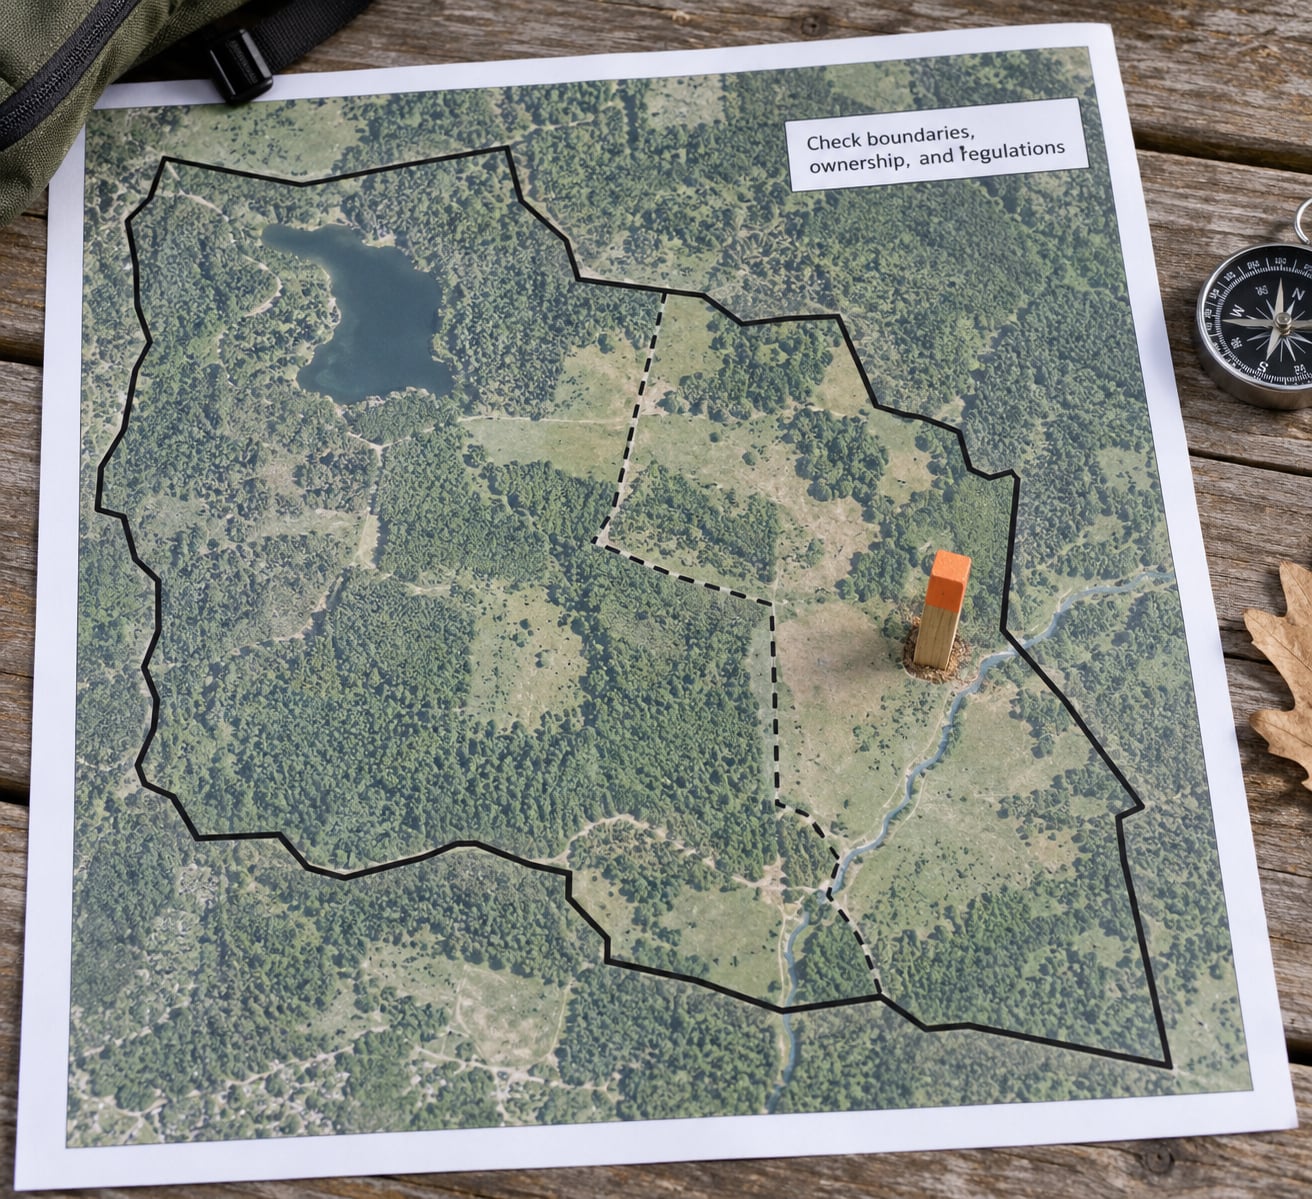
Before you load the truck, establish the legal shape of the place. On most agency sheets the outer boundary is a heavy line and internal tract boundaries are dashed, so trace the outer line all the way around and note where private ground butts against it. Public land is rarely a clean rectangle, and inholdings are common.
Confirm the same line on the ground. Boundary markers vary by agency: painted blazes on trees, painted rock or post markers, steel corners, wire fences, or brown or white signs on stakes. Faded signs and downed blazed trees are the usual failure, and I have never met a hunter who has not walked past a marker without noticing it.
Read the restrictions that live on the map. No camping, no ATVs, no horses, sign-in required, closed to hunting during a nesting period, check-in required at the kiosk: these appear as map notes or footnotes as often as they appear as symbols. Then check the legal status of crossing a boundary after a shot. A deer that leaves the management area mid-track puts you on private ground, and the rules for that follow state law and agency guidance rather than anything printed on the map.
When the brochure, the county plat and your app disagree about where the boundary runs, the agency is the tiebreaker. County plats are survey documents and accurate in their own way, but they can lag a land transfer. App layers are only as good as the last data push. Find out which one is out of date, and when in doubt call before you walk in.
Match the map to current field conditions
A printed map is a snapshot. Weather moves it. Tides expose mud flats that were impassable in June and put you ankle-deep in September. Flooding covers low crossings and turns the drainage you scouted on foot into something you cross with a boat. Drought drops water holes and changes which crossings hold.
Storms take roads out. Road work closes gates. Prescribed burns close blocks for days at a time, and rutting from fire equipment can make a mapped road undrivable long after the burn is out.
So check the agency site for closure amendments issued after the brochure date, and call the office the day before you travel if the area had recent rain or a burn. If a gate is chained when the map shows it open, the gate wins. That one habit prevents most of the frustrating trips people describe in hunting groups.
Common Mistakes
Almost every bad field day with a WMA map traces back to one of these.
Ignoring the legend. People assume colors mean the same thing everywhere. They do not. Read the legend first, every time, even on an area you have visited before.
Treating every line as a public road. Dashed lines are often old logging roads, and driving them can cost you a citation or a stuck axle. Look for the road classification in the notes.
Using an outdated brochure. Closures, unit boundaries and even ownership change between editions. Check the revision date, then check for amendments printed after it.
Reading symbols from another state’s map. Legend conventions are not standardized across agencies. The orange block that means closed to hunting on one sheet means something else on another. When in doubt, ask the agency.
Assuming the app knows where the boundary is. Phone layers carry some error, and under heavy canopy the position dot can wander. Treat the app as a helpful second opinion, not the authority.
Forgetting the fine print. The footnote block carries amendments, revision history and restrictions that override what the map body shows.
Two habits cover most of it: verify the map’s date before you pack, and verify the boundary on the ground before you spread out. Pairing a digital layer with an actual sign check is the approach experienced hunters keep recommending, and it is the reason fewer people end up explaining themselves to a county deputy.
Frequently Asked Questions
What is the first thing to look for on a wildlife management area map?
Start with the legend and the revision date, in that order. The legend tells you what every color, line style and symbol means, and the revision date tells you whether the closures printed on the sheet are still current. Only after those two are clear does it make sense to look at roads, hunt zones and boundaries. Reading the map body first is what leads people to the wrong unit or a closed block.
Are all roads and trails on a wildlife management area map open to the public?
No. Most agencies allow motor vehicles only on designated roads, and those roads can be seasonal, gated, or restricted by vehicle type. Trails shown on the sheet are frequently foot or non-motorized routes, and some are closed during hunting season to protect recovering habitat. The map notes or regulation booklet list which lines count as designated roads. Confirm before you commit to a route you have never driven.
How can I tell whether a map symbol is a public access point?
Look for parking symbols, numbered or named access points, and trailhead or check-in kiosk icons in the legend. Public access is usually marked at a road or parking area, not scattered across the property, and it is frequently limited to a specific point rather than general boundary access. Because symbols differ by agency, verify with the state wildlife agency that the access point you spotted is current and open for your activity.
Can I use a wildlife management area map with offline GPS?
Yes, and you should. Download the map layer for the area before you leave cell coverage, and carry a paper copy as backup. Handheld GPS and phone apps both hold a reasonable position under open canopy, but they drift in thick timber and near steep terrain. Batteries fail in cold weather, so pack a power bank and a compass. The map tells you where the boundary runs; the compass tells you which way you are facing when the screen goes dark.
Why does a management area map show closures or seasonal boundaries?
Closures exist for reasons like nesting and breeding protection, habitat recovery after a burn or timber harvest, construction, flooding, and controlled access for safety. They are drawn as hatched or colored fills, dashed internal lines, or as map notes. Closures are time-bound and species-specific, so the same area can be open in October and closed in April. Check the closure date range, and look for amendments issued after the brochure print date.
How do I use a map to plan around tides and weather?
Use the map to spot the places water changes first: low crossings, marsh edges, creek bottoms and the low end of any road that leaves high ground. On tidal water, the difference between a dry route and a wet one is often a mile, so check tide tables before you commit to a loop that crosses flats. After heavy rain, call the agency about road condition, since mapped roads are frequently impassable when water is high.
Conclusion
Four actions cover almost the whole job. Confirm you have the current edition of the official map, read the legend and the fine print before you read anything else, verify your hunt zone, access route and closures against the current regulations, and compare the mapped boundary with the markers on the ground.
Then check the weather and any agency closure notices the night before. Maps tell you how the land is supposed to be. The office tells you how it is this week.