To use a cooler to age meat in the field, hold the cut at 34-38F, keep the drain plug open, and set it on a rack so it never sits in meltwater. A deer quarter aged that way for the length of a normal hunting trip comes out tender instead of stringy, and most venison needs two to four days in that band before you butcher and freeze it. Be clear-eyed about one thing, though. A cooler is a wet-aging vessel, not a dry-aging locker, so it will not give you the nutty, concentrated flavor of three weeks in a walk-in.
I have run this setup on multi-day bow camps in Montana and late-season deer trips in Missouri, and the same three numbers decide whether it works: cooler air temperature, ice-to-meat ratio, and how long you go between draining the meltwater. Get those right and the rest is patience.
Table of Contents
- What You Need
- Step-by-Step: How to Use a Cooler to Age Meat in the Field
- Step 1: Choose a Fresh, Suitable Cut
- Step 2: Season and Wrap the Meat
- Step 3: Build a Stable Cold Zone
- Step 4: Monitor and Turn the Cut
- Step 5: Know When to Stop
- Common Mistakes
- Frequently Asked Questions
- Can you age deer meat in a cooler?
- How long can deer meat stay in a cooler?
- How long will deer meat last in 70 degree weather?
- Is dry ice useful for aging meat in a cooler?
- How do you tell aging apart from spoilage?
- Can you freeze venison straight from the cooler?
- Conclusion
What You Need
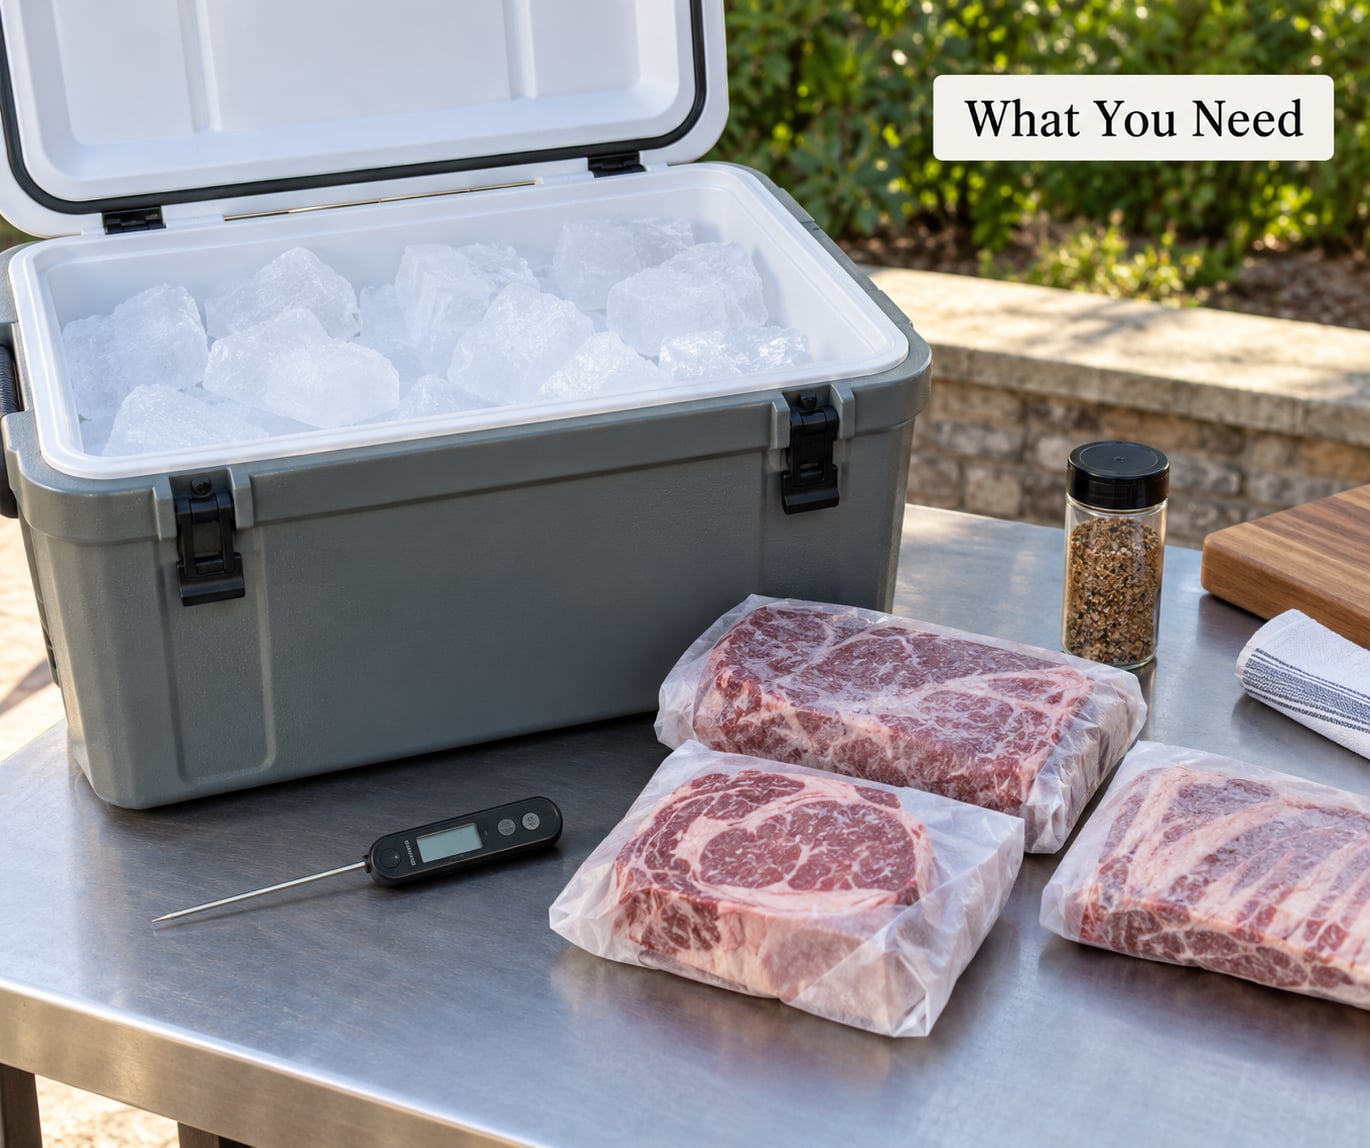
You need less than most people expect, and everything here is either already in your truck or cheap at a hardware store.
- A hard-sided cooler with a working drain plug. Rotomolded bodies hold temperature better than soft fabric coolers, and you want a plug you can open on a schedule. A 48 to 70 quart cooler handles roughly 30 to 60 pounds of meat on ice for two or three days.
- Block ice or frozen water bottles. Plan on roughly one pound of ice per pound of meat for a first load, plus a spare block or two for re-icing. Frozen bottles double as a false bottom you can stand the meat on.
- A digital thermometer with a remote probe. A cheap two-channel unit lets you read the air in the cooler and the deepest muscle in the hindquarter without opening the lid.
- The meat. Fresh, freshly dressed quarters or primals from an intact animal, still hard and well chilled.
- Coarse salt and pepper. A dry brine of about 1 percent of the meat weight is enough. Nothing fancy.
- Breathable wrap and sealed wrap. A game bag or clean burlap for the first layer, heavy plastic or a sealed bag over that.
- A wire rack, a length of PVC, or a cutting board. Anything that holds meat two inches above the ice bed.
- A bucket and a way to lift. Draining a 40 pound cooler of meltwater is a two-person job worth planning for.
Step-by-Step: How to Use a Cooler to Age Meat in the Field
Step 1: Choose a Fresh, Suitable Cut
Start with fresh, intact meat that came from a clean kill. Leg quarters, both hindquarters, and shoulder primals all hold cold well because of their mass. A gut-shot animal is a different case. Hunters and extension guidance both treat contaminated meat as something to process fast or discard rather than age, no matter how good the cooler setup is.
Skip anything that already smells off, has a sticky or tacky surface, or has been sitting warm. Cooling a load that is already past 40F is a salvage operation, not aging.
Thin boneless cuts are the wrong choice for cooler aging. Venison is lean enough that it dries faster than beef, and a steak laid on ice in a cooler for three days turns pale and loses its edge.
Step 2: Season and Wrap the Meat
Dry-brine first. Rub about 1 percent of the cut weight in coarse salt, a couple hours or overnight if you have the time. Salt draws a little moisture to the surface and seasons the interior, and it is the only seasoning step most hunters need. Add black pepper at the end of the process rather than up front.
Wrap in two layers. The inner layer should breathe: a game bag, clean burlap, or even a paper sack keeps dust and ice chips off while allowing some air movement. The outer layer seals: a heavy trash bag or a food-grade bag closes the gap.
The reason for two layers is juice control. Raw venison juices carry bacteria, and if they drip onto a bag of cooked food at the bottom of the cooler you have built yourself a cross-contamination problem. Keep every piece on its own surface or in its own sealed bag.
Pull the tenderloins out now if you want them. Experienced hunters on Deer Hunter Forum routinely pull tenderloins on day one or two because aging them longer builds a thick rind and little usable meat underneath.
Step 3: Build a Stable Cold Zone
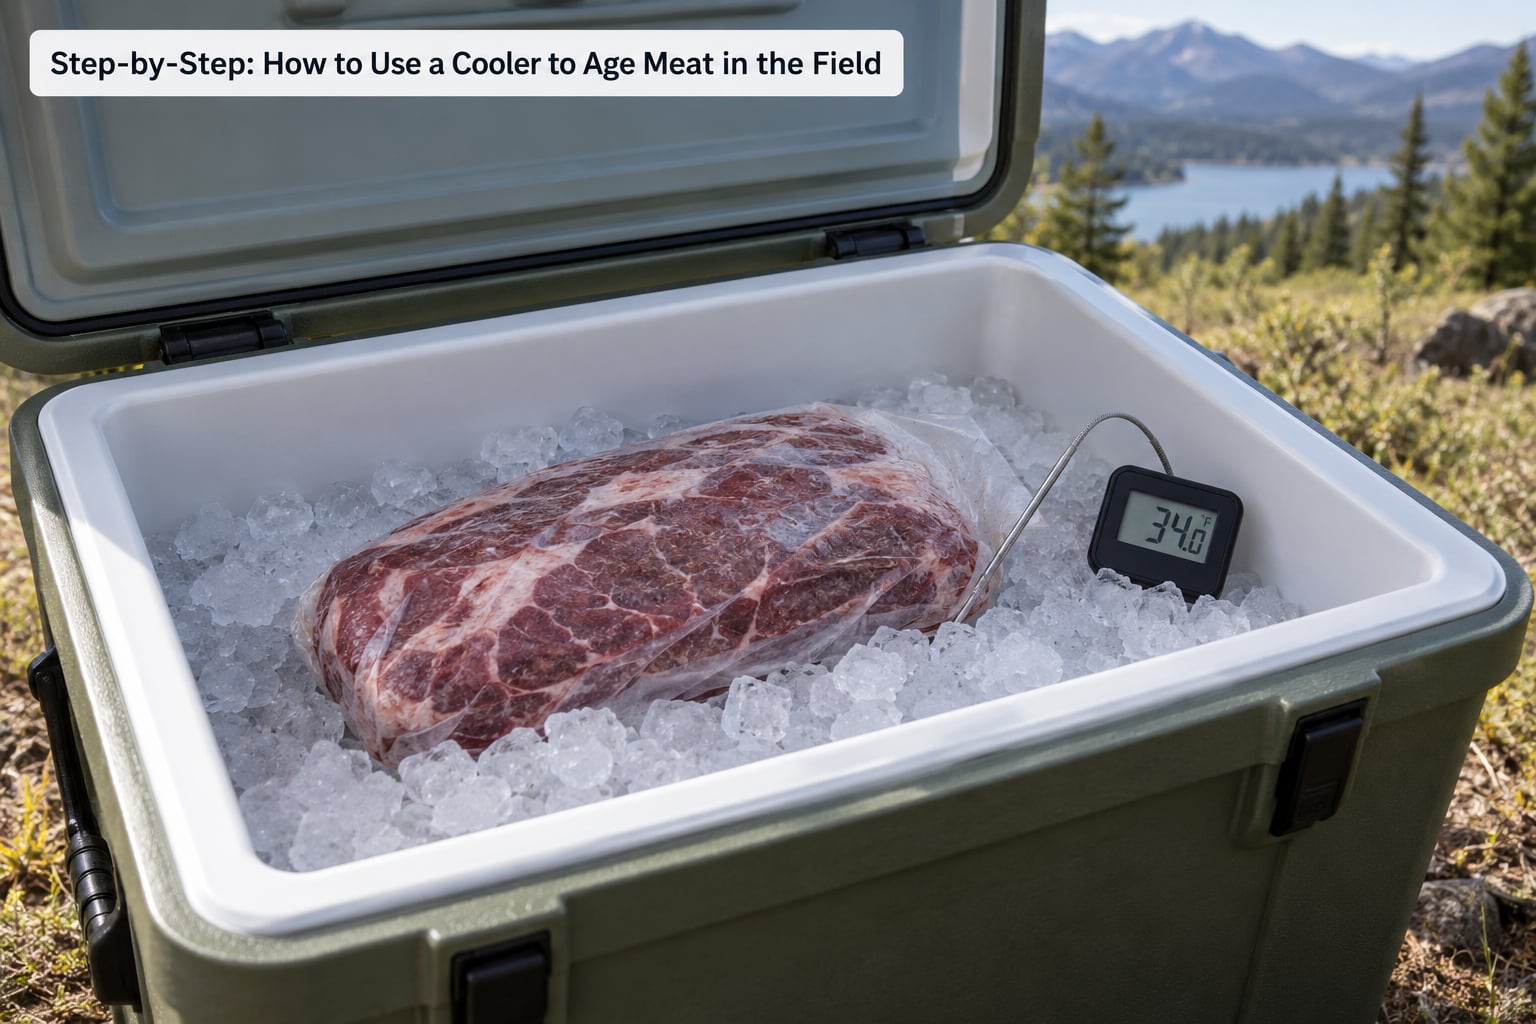
Set up the cooler so cold air moves under and around the meat without the meat touching water.
- Open the drain plug and aim it into a bucket. Hunters on ArcheryTalk and The Firing Line both describe the same setup: meat in the cooler, ice filling the gaps, drain running.
- Pour a deep block of ice in the bottom of the cooler.
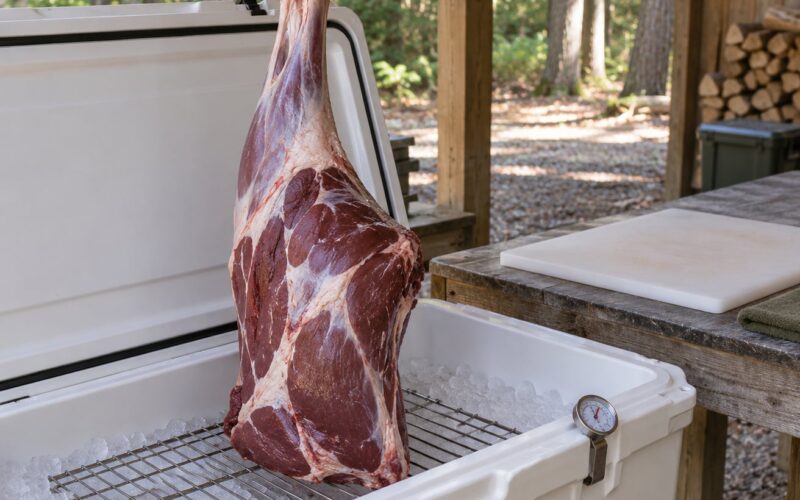
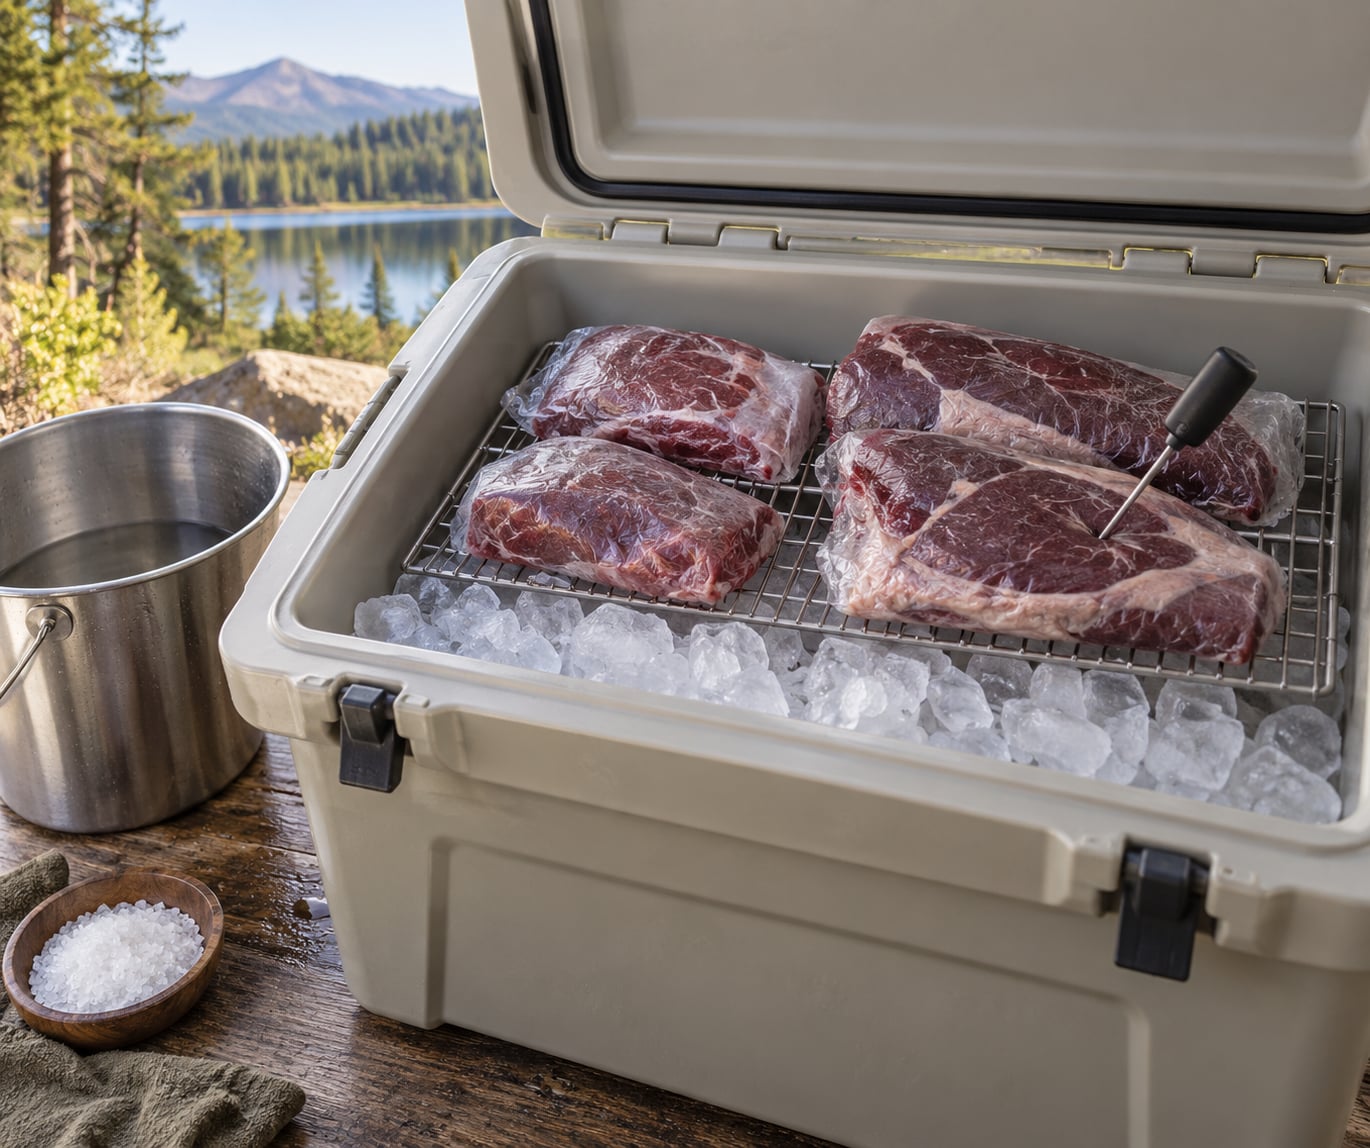
- Stand your rack, PVC, or frozen bottles on that ice so the meat sits two to three inches above it.
- Arrange the wrapped quarters with air between them, not stacked flat.
- Fill every remaining gap with loose ice. Pack ice around the sides and over the top, not only underneath.
- Drape a light mesh screen or hardware cloth over the meat so the top layer of ice cannot press directly against it.
- Push the thermometer probe into the deepest muscle of the hindquarter, mid-thigh, where the temperature reads highest.
That arrangement is the ice-drained method, and it wins over the ice-bath method for one reason: meltwater. Meat submerged in meltwater sits in a near-constant bath around 40F, which is the worst case on every count. It slows the enzyme work you came for, and it dilutes flavor. Ice-bath camps exist because people see them and assume they work. Draining is the better habit.
On a warm day, shade the cooler, close it, and treat opening it as a scheduled event rather than a habit. Ice melts faster from repeated opening than from heat alone.
Step 4: Monitor and Turn the Cut
Run this check every 12 to 24 hours. It takes five minutes with the probe and it is the difference between aging and spoiling.
- Read the probe temperature in the hindquarter. Write the number and the time in a phone note. Trend matters more than any single reading.
- Drain the meltwater through the plug into your bucket.
- Look at the meat. Pale or waterlogged meat means meltwater contact. Reposition the cut higher.
- Top up with fresh ice around the sides and above, not poured over the meat.
- Turn each quarter once per check so all sides get the same cold.
- Smell the cooler with the lid open. A clean, slightly tangy or gamey smell is normal aging. A sour, rotten, or ammonia-sharp smell means stop and use or discard the meat.
Add ice whenever the air reading drifts above 38F. If your nights dip below 28F, a thin layer of surface freezing on the outside of the cut is fine and even slows things down; if the core of the thigh freezes solid, no aging is happening at all. That frozen core is the single most common complaint on the bowhunting forums, and it happens because the cooler is too small and too full of ice for the amount of meat.
Step 5: Know When to Stop
Stop aging on time, temperature, or smell, whichever comes first.
For time, a young deer or doe needs 2 to 3 days. A typical yearling buck does well at 3 to 4 days. A mature rutting buck can take 5 to 7 days and generally will not get more tender past that window in a cooler.
| Animal | Days in the cooler at 34-38F | Note |
|---|---|---|
| Fawn or young doe | 2 to 3 days | Highest pH of the group, benefits most from waiting |
| Typical yearling buck | 3 to 4 days | The everyday answer for most hunters |
| Mature or rutting buck | 5 to 7 days | Long connective tissue; gains flatten after a week |
| Elk or moose quarters | 5 to 10 days | Large mass holds cold well, needs more time |
| Goat or pronghorn | 3 to 5 days | Lean, benefits from a shorter hold |
| Waterfowl | 1 to 2 days | Fatty skin; keep cold, do not age long |
For temperature, stay at or below 40F the entire time. That is the USDA danger-zone floor for perishable food, and food-safety guidance treats 40 to 140F as the range where pathogens multiply quickly.
For smell and look, aged venison should feel dry and firm with a thin tacky pelicle. Slime, discoloration, or a rotten odor ends the process immediately.
One honest limit. Inspected commercial aging runs 21 to 60 days under controlled humidity and temperature. A cooler cannot match that, so do not sell cooler-aged venison to anyone as dry-aged. You also cannot skip the final cook step. USDA safe minimum internal temperatures still apply: 145F for whole cuts, 160F for ground meat, 165F for poultry.
Common Mistakes
Leaving the drain plug closed. Meltwater accumulates and the meat ends up in a bath near 40F. Open the plug and drain every check.
Packing the cooler solid with ice. Ice takes space the meat needs, and an over-packed cooler freezes the outside of the cut while the center stalls. Ice around the meat, not on top of it.
Leaving the meat to freeze. A frozen core stops enzymatic tenderizing entirely. Put the meat on a raised rack and keep a probe in it so you can catch a freeze before it happens.
Using a trash bag as the only wrap. Sealed plastic traps condensation and puts the meat in warm, wet air. A breathable inner layer under the plastic fixes it.
Skipping the re-ice routine. Hunters on the hunting forums report success with two-week cooler camps, and every one of them drains and re-ices daily. Two days of neglect is what turns a good cooler into a spoiled load.
Salting the meat and leaving it in standing meltwater. A salt brine in a cooler is a curing method some hunters use, roughly a pound of table salt and ice with enough water to cover the meat. It works, but it cures rather than ages, and the meat will not taste like it came off an animal that week. Use it or do not.
Treating a cool morning as a safe cooler. A home refrigerator cycles between roughly 33 and 42F with no airflow and gets opened all day. A cooler with block ice and a drain holds steadier than most kitchen fridges.
Frequently Asked Questions
Can you age deer meat in a cooler?
Yes. A cooler holding quarters or primals at 34-38F on block ice gives you wet aging in the field. Leave the drain plug open, keep the meat on a rack above the ice so it never sits in meltwater, and check it every 12 to 24 hours. Two to four days is the useful range for most venison.
How long can deer meat stay in a cooler?
At 34-38F, plan on 2 to 3 days for a young deer, 3 to 4 days for a typical buck, and 5 to 7 days for a mature rutting buck. Above 40F, cut that time sharply and get the meat cooked or frozen. A cooler with a proper ice ratio holds its temperature for roughly two or three days between full re-ices.
How long will deer meat last in 70 degree weather?
Treat 70F as a short-hold situation. Shade the cooler, keep the drain open, use a full load of block ice, and expect to drain and re-ice every twelve hours or so. If the probe reads above 40F at any check, stop aging and either cook the meat or freeze it the same day.
Is dry ice useful for aging meat in a cooler?
Dry ice will freeze the surface of the meat, and freezing stops enzymatic tenderizing, so it works against you if your goal is aging. It is useful for freezing a load down fast at the end of a trip, or for holding meat below 40F when you cannot keep up with ice. Handle it with gloves and never seal it in an airtight cooler, since it gives off carbon dioxide gas.
How do you tell aging apart from spoilage?
Normal aging shows a dry, firm surface with a thin tacky pelicle and a clean or slightly gamey smell. Spoilage shows slime, green or dark discoloration, and a sour, rotten, or ammonia-sharp odor. When in doubt, cook the meat to its USDA safe minimum internal temperature, which is 145F for whole cuts and 160F for ground meat.
Can you freeze venison straight from the cooler?
Yes, and freezing after two to four days of cooler aging is the usual sequence. Vacuum seal or bag the butchered meat in portions you will cook, label it, and freeze it solid. Meat frozen solid is safe indefinitely, though the pre-aging days you spent in the cooler are where most of the tenderness came from.
Conclusion
First action: get the meat cold. Field dress the animal, quarter it, salt it lightly, wrap it in a breathable layer under a sealed one, and set it on a rack over an open-drained ice bed before you do anything else. From there it is discipline rather than technique.
Measure the temperature twice a day with a probe in the deepest part of the hindquarter, drain and re-ice on every check, and stop at the first slime or sour smell. Keep the meat below 40F the whole time, follow USDA safe minimum internal temperatures when you cook it, and check your state’s rules before carrying game meat across a state line. Do that and a cooler beats a race home with tough meat every time.