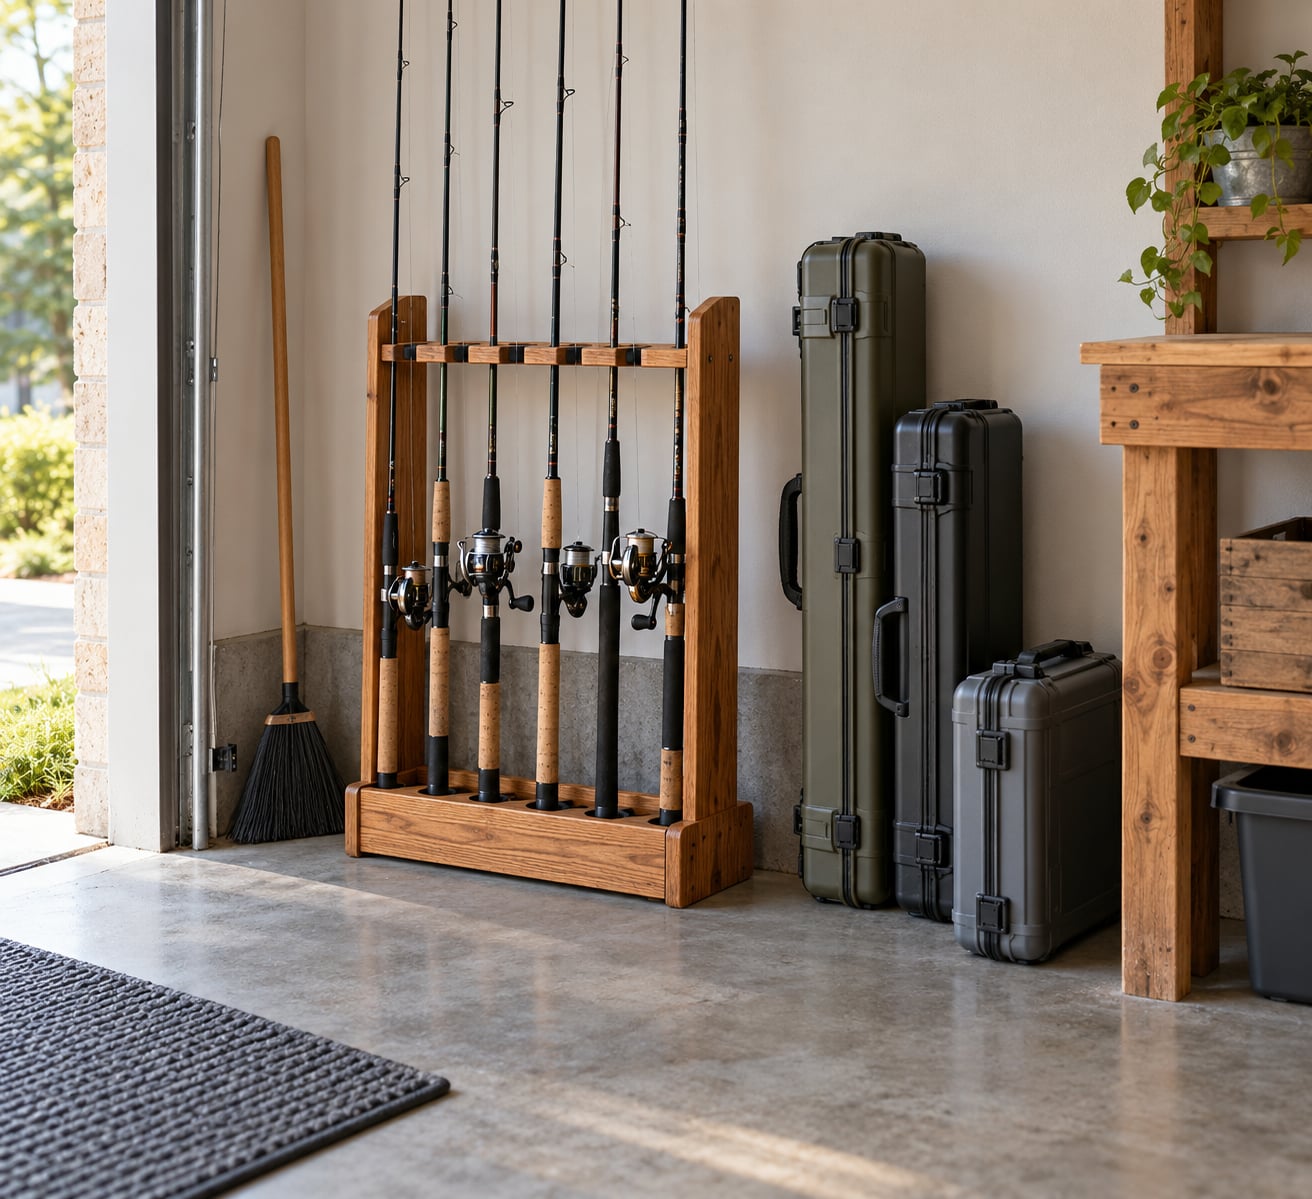
To store fishing rods in a garage without damage, cradle them off the floor at two points so the blank never carries its own weight, anchor the rack into studs or joists, and keep gear away from heat swings and damp concrete. A wall rack at shoulder height works for a dozen rods; a ceiling rack above the vehicle or boat frees up wall space for a larger collection. Most ruined rods in garages were never stored badly on purpose. They were leaned in a corner, stacked flat without support, or put away wet and left there through a hot August.
The whole job takes an afternoon once the rods are dry. Most of that time goes into cleaning salt off reel seats and getting hardware into framing rather than drywall.
Table of Contents
- What You Need to Store Fishing Rods in a Garage
- Step-by-Step
- Step 1: Prepare the Rods and the Garage Storage Area
- Step 2: Choose Vertical, Horizontal, or Case Storage
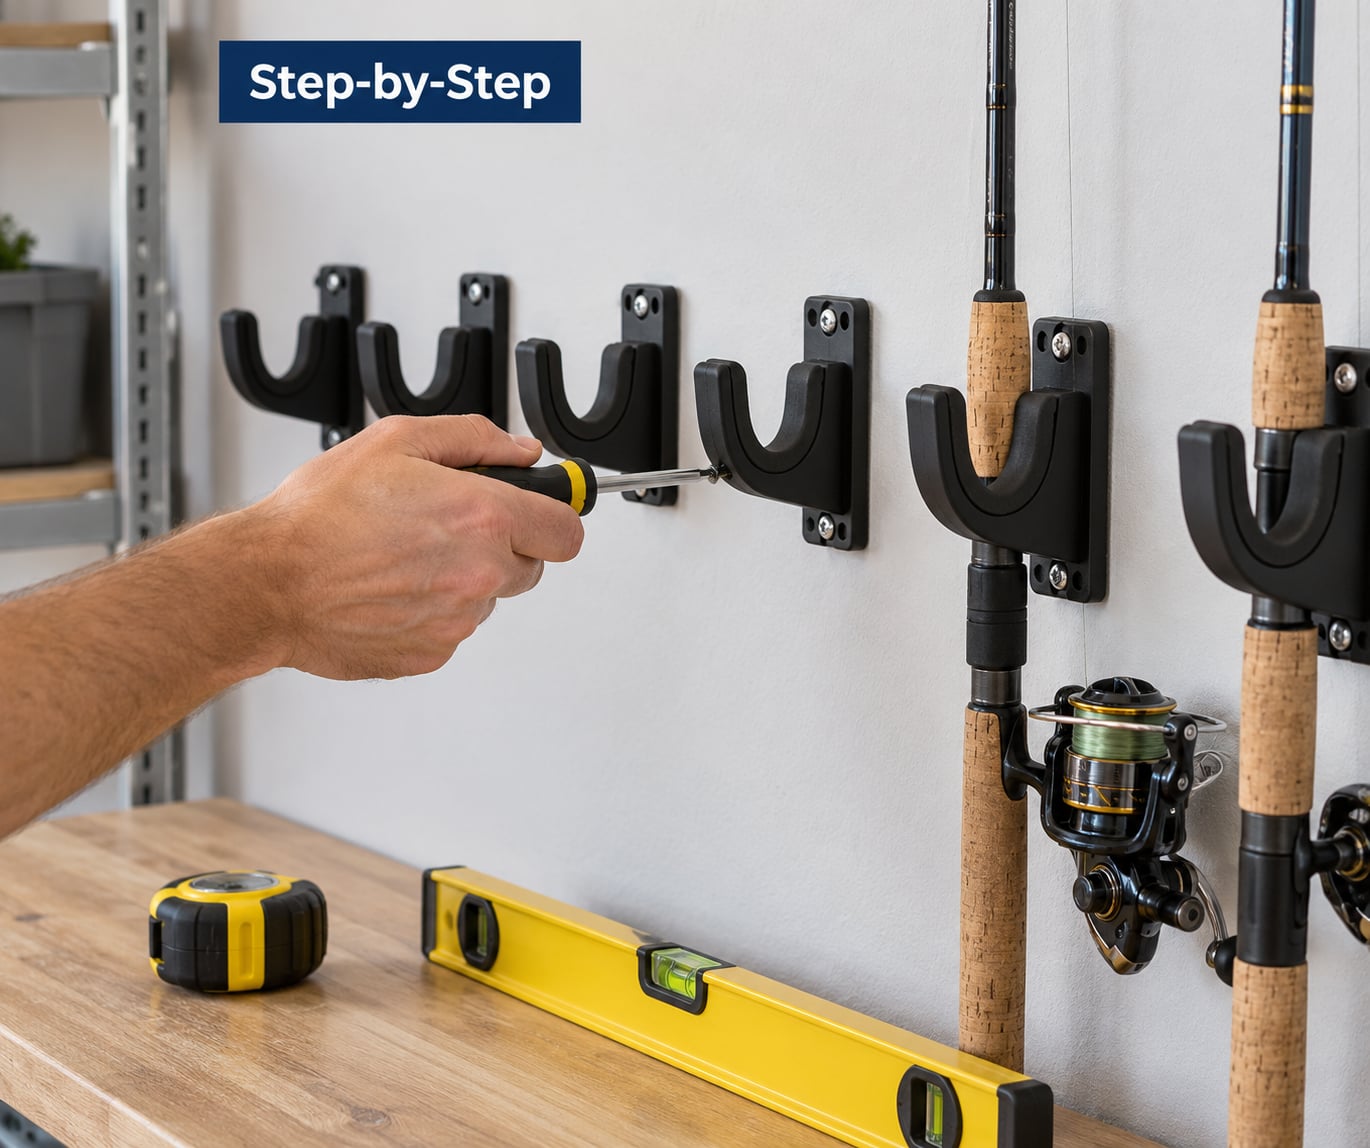
- Step 3: Install Secure Racks or Wall-Mounted Holders
- Step 4: Position Rods to Prevent Bends and Tangles
- Step 5: Add Cases, Hooks, and Moisture Protection
- Step 6: Maintain the Storage System
- Common Mistakes to Avoid When Storing Fishing Rods in a Garage
- Frequently Asked Questions
- What is the best way to store fishing rods in a garage?
- Should fishing rods be stored vertically or horizontally in a garage?
- Can I store fishing rods in PVC pipe racks?
- How do I keep fishing rods from rusting in a humid garage?
- Where should I store fishing reels with my rods?
- How do I store long fishing rods in a small garage?
- Conclusion
What You Need to Store Fishing Rods in a Garage
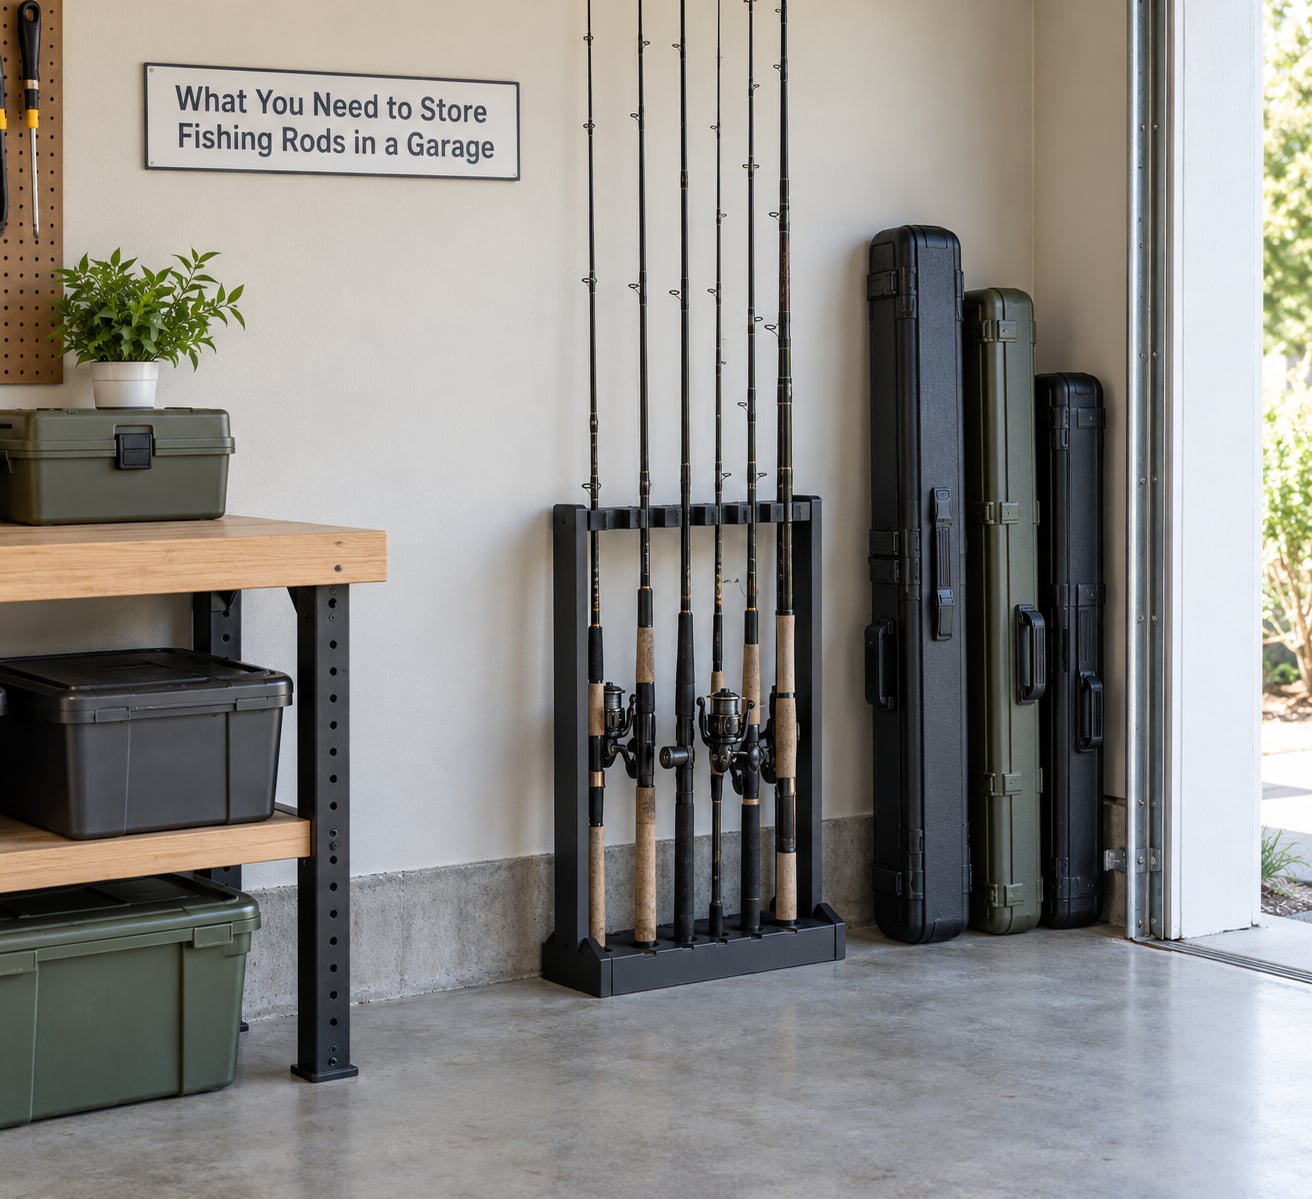
Gather the hardware first, then buy or build the rack. Rushing the shopping list is how people end up with a rail hanging off drywall that sags under six rod-and-reel combos.
- A rod rack sized to your collection. Track-style ceiling racks, wall rails with hooks, and vertical wall holders all hold the same rods. Count the rods first.
- Wall-mounted holders or padded hooks. Rubber- or felt-lined hooks matter more than the bracket material.
- Hard cases. A couple of them for the rods you would actually cry over, plus anything two-piece or oversize.
- Padded rod sleeves or soft ties. Cheap insurance against the guide damage that happens when a rod touches a hole edge.
- Anchors matched to the surface. Lag screws into studs, joists or rafters. Drywall anchors only for light, empty rails.
- A stud finder, tape measure, level and drill. Also a square, because drilled holes that drift out of alignment make uneven spacing.
- A broom or shop vacuum. Grit on a concrete floor is what wears the finish off a reel seat.
- Moisture control. A dehumidifier, a box of desiccant, or at minimum a fan and a raised platform so nothing sits on bare concrete.
- A step stool. A wide, stable one with a handle. Not a folding chair.
Step-by-Step
Step 1: Prepare the Rods and the Garage Storage Area
Rinse every rod before it goes into storage, especially if you fish saltwater. Salt crystals left on a blank or in a reel seat keep drawing moisture out of the air and turn to rust spots that are miserable to deal with.
Dry them properly. Wipe the blank and handle down, then let rods air dry horizontally for a few hours rather than shoving a damp rod straight onto a rack where the moisture has nowhere to go.
Inspect while you are at it. Run a fingertip along the blank looking for nicks and flat spots, check that guides are straight and firmly seated, spin the reel handle, and look for a stiff drag. Anything already damaged gets set aside so you are not storing a problem and finding it in April.
Then clear the floor. Sweep the bay, move the boat or vehicle far enough that you can stand in front of the wall, and mark the stud, joist or rafter locations with a pencil before anything is drilled.
Step 2: Choose Vertical, Horizontal, or Case Storage
Three decisions settle it: how many rods you own, how much uninterrupted wall you have, and how often you reach for gear. Work through them in that order.
Vertical wall storage holds a surprising amount. A single 8-foot wall takes rods stored butt-down with handles on the floor, which suits short rods and keeps the reel at a reachable height. It looks untidy and it eats the whole wall, so it works best on a wall you were not planning to use for shelving.
Horizontal wall rows cost more space per rod. Each rod needs its own 6 to 9 feet of clear run, so a 12-foot wall gives you one row of long rods or two rows if you alternate the direction they face. Multiple rows on shelf brackets are how most collections of 20 to 40 rods actually get stored.
Ceiling racks keep both the floor and the walls free, which is the right call when a boat or a second vehicle already owns the bay. The trade is reach: anything above head height needs a step stool every single time.
Hard cases are storage, not a rack. Use them for the expensive rods, for anything going through a season of absence, and for two-piece rods where the blank is worth protecting from a dropped tool.
Step 3: Install Secure Racks or Wall-Mounted Holders
Anchor into structure. A spread of medium rods with reels attached adds up faster than people expect, and drywall anchors will slowly pull out under that repeated sideways pull of lifting a rod out. Lag screws into studs on walls, joists or rafters on ceilings. If you have to hang from drywall, keep the rail empty of heavy combos and check it twice a year.
Space the holes for the gear you actually own. Roughly 6 to 8 inches works for spinning rods, tighter spacing crowds big reels, and owners of 9/0 conventional and musky setups usually do better with wide-open boards and no individual slots at all.
Keep the rack clear of trouble spots. Nothing above the path the garage door travels when it opens, nothing near a ceiling fan, no chemical shelf or water heater directly below or above, and no blocking of electrical panels or outlets.
Mind your feet. Set the stool on level concrete, keep three points of contact, and never stand on the top step or the cap of a ladder to reach a rod. On a high ceiling, a rolling rack on swivel casters solves the reach problem better than any ladder, and it moves out of the way when the boat comes in.
Step 4: Position Rods to Prevent Bends and Tangles
Every rod needs support at two points: the handle and the blank somewhere up its length. One point means the rod hangs from the tip and slowly bows.
Leave 8 to 12 inches of tip past the last support. That overhang is the difference between a blank sitting straight and a rod that develops a permanent curve from its own weight.
Keep the hooks lined up in a row and do not force rods together. Where space is tight, alternate which direction the handles face to gain another row of rods without crowding.
Turn the reels to face the aisle so a rod comes out without shuffling the neighbours. Group by technique, spinning on one row, fly and ultralight on another, musky and trolling on the long end where a rod will not hit something on the way down.
Slide rods in slowly, supporting the blank with one hand. Shoving a rod into a hole by the tip is the single most common way a line guide gets snapped in a garage.
Step 5: Add Cases, Hooks, and Moisture Protection
Sleeves are the cheapest upgrade available. A soft rod sock over the top third of each blank keeps guides from catching on hole edges, PVC collars or a metal rail, and it takes under a minute per rod.
Line hard-water rods carefully. Ice rods and walleye rods live in wet sleeves, so felt or foam lining inside the holder matters more for those than for anything else in the garage.
Cover with something breathable. A cotton sheet or the rod sleeves themselves will keep dust off. Plastic bags wrapped tight trap condensation against the blank and do more harm than the dust they were meant to stop.
Attack humidity at the source. Keep rods off bare concrete, run a dehumidifier or a fan in the driest months, and never point a space heater straight at a rack. Heat swings hurt reels more than cold does, and an unheated garage in most regions swings a lot between January and July.
Step 6: Maintain the Storage System
Walk the rack every month or so. Look for rust starting at the reel seat and line guides, and check that no blank has started to bow since the last look.
Check the mounts. A rack that creaks when you pull a rod is telling you a screw is working loose, and a loose screw in a ceiling rack is a falling-rod problem rather than a tidy-up problem.
At the start of warm weather, blow dust out of the reels with canned air and run each line out a few turns on the reel. It takes ten minutes and clears the grit that ends up inside the drag.
Rotate the collection. Bring winter rods out as spring arrives and put the off-season rods back, so no single rod sits in the same position year after year. Wipe the handle and reel seat once a year and the gear looks new.
Common Mistakes to Avoid When Storing Fishing Rods in a Garage
Almost every damaged garage rod traces back to one of these.
Leaning rods in a corner. They slide, they fall, and the tips land on concrete. A single wall rail solves it for a few dollars.
Stacking horizontally with no support. Rods piled flat bow at the middle and the guides take the weight. Two-point support or a hard case, always.
Bare metal hooks and sharp drilled holes. These snap guides. Line the holes with felt, foam or rubber, and use sleeves.
Storing gear wet. Salt and moisture together will pit a reel seat within a season. Dry first, store second.
Cases or rods parked next to a heater. Heat and cold cycling dries out line, cracks plastic cases and softens reel grips. Move them a few feet away.
Overloading a drywall rail. Ten rod-and-reel combos is well past what drywall anchors are meant to hold. Move the load into studs and joists.
Racks in the swing path of the garage door. Open the door fully with rods loaded and check clearance before you call the job finished.
Wrapping everything in plastic. Condensation forms and sits against the blank. Use breathable covers instead.
Forgetting the reels. Dust settles low, right where reel seats and handles sit. An old towel over the row or a quarterly canned-air pass handles it.
Frequently Asked Questions
What is the best way to store fishing rods in a garage?
Most anglers do best with a wall-mounted rod rack at shoulder height if they own a dozen rods or fewer, and a ceiling track above the vehicle or boat once the collection gets larger. Keep reels facing the aisle, leave 8 to 12 inches of tip overhang, anchor the hardware into studs or joists, and keep everything away from heaters, damp concrete and chemicals.
Should fishing rods be stored vertically or horizontally in a garage?
Vertical storage costs far less wall space and suits short rods, but it eats an entire wall and looks untidy. Horizontal rows give you two support points per rod and stay tidy, though each rod needs 6 to 9 feet of clear run. For mixed lengths, mount two boards at different heights so every rod gets supported along the blank.
Can I store fishing rods in PVC pipe racks?
Yes. Cut PVC into 3 to 12 inch sections, mount them upright on a board, and line each tube with felt or a foam sleeve. It makes an inexpensive floor rack that holds a lot of rods. Stabilize the base so it cannot tip, and expect to reach for the guide rings carefully. Harder blanks deserve a rack with proper padding.
How do I keep fishing rods from rusting in a humid garage?
Rinse salt off rods as soon as you get home, dry them fully before storing, and keep them off bare concrete. A dehumidifier or a constantly running fan makes a measurable difference in a damp bay. Use desiccant packs in hard cases, cover racks with breathable material, and never seal damp gear inside a closed case where condensation has nowhere to go.
Where should I store fishing reels with my rods?
Keep reels attached and facing the aisle so a rod comes out in one motion, which also keeps line from dragging on a dusty floor. Blow them out with canned air at the start of warm weather and run the line out a few turns to clear grit from the drag. Spinning reels sit high enough to stay clean on a wall rack; conventional reels on the floor want a raised platform.
How do I store long fishing rods in a small garage?
Run the long rods horizontally along a single wall, one row with the handles staggered, so 9 foot rods take one pass of wall instead of a dedicated column. For a tight bay, use a ceiling track above the vehicle or a rolling rack on swivel casters that you push aside when you need the space. Skip the rod from any crowded slot rather than bending it in.
Conclusion
Start by drying and inspecting the rods, then pick the method that matches your space: a shoulder-height wall rack for a smaller collection, ceiling storage above the vehicle once the count climbs, hard cases for the gear you value most. Secure it into framing, leave clearance for handles and tips, and keep moisture and heat swings away from it. After that, a few minutes each month is enough to keep everything straight and rust-free through 2026 and every season after it.